
RIDE THE AMAZON WAVE
The Pro Seller's Guide to Private Label Success
_
BOOK GRAPHIC PAGE
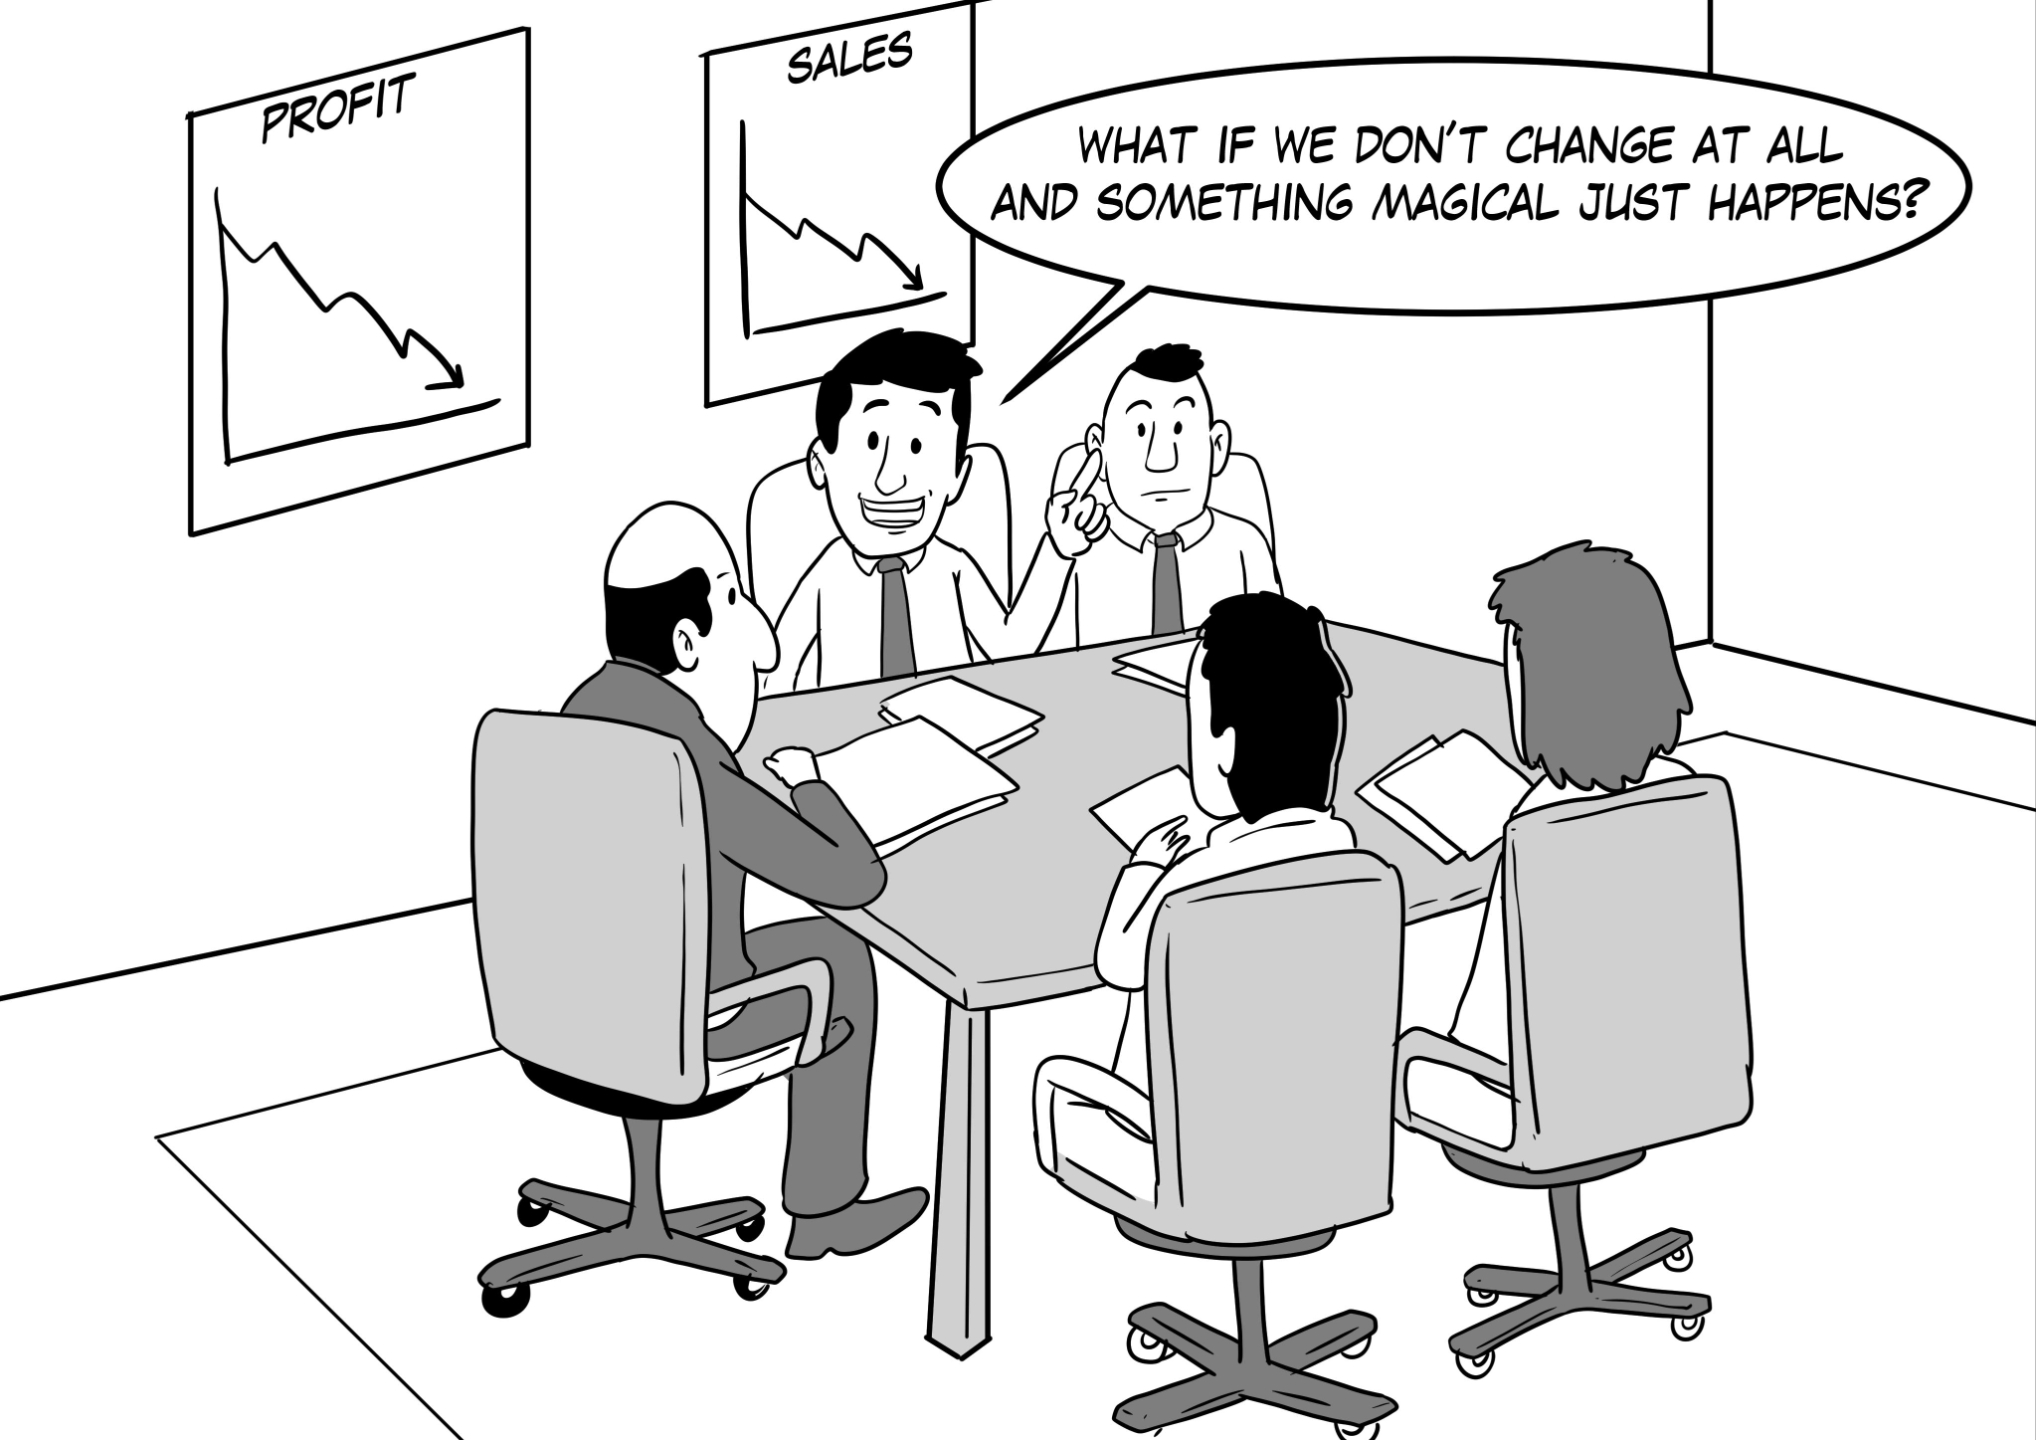
CHAPTER 1: The Amazon Seller Mindset
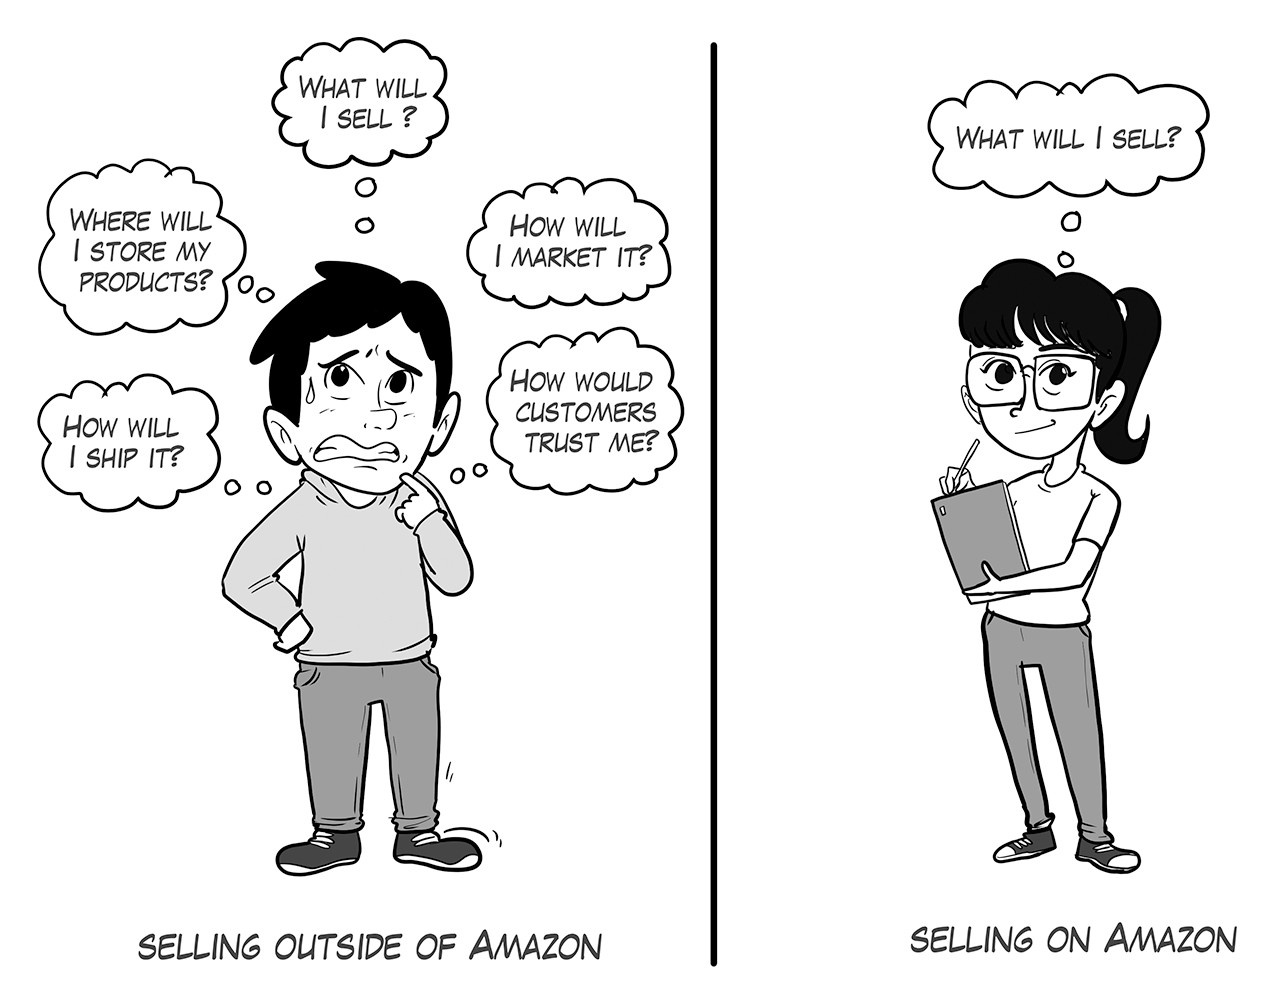
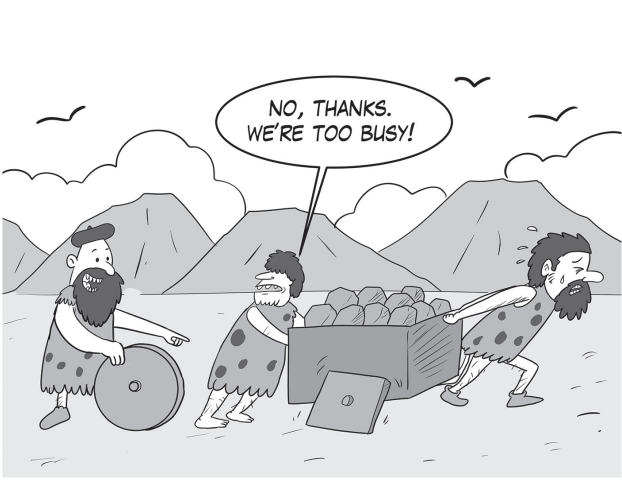
GRAPHIC 1: Selling Outside of Amazon vs Selling on Amazon
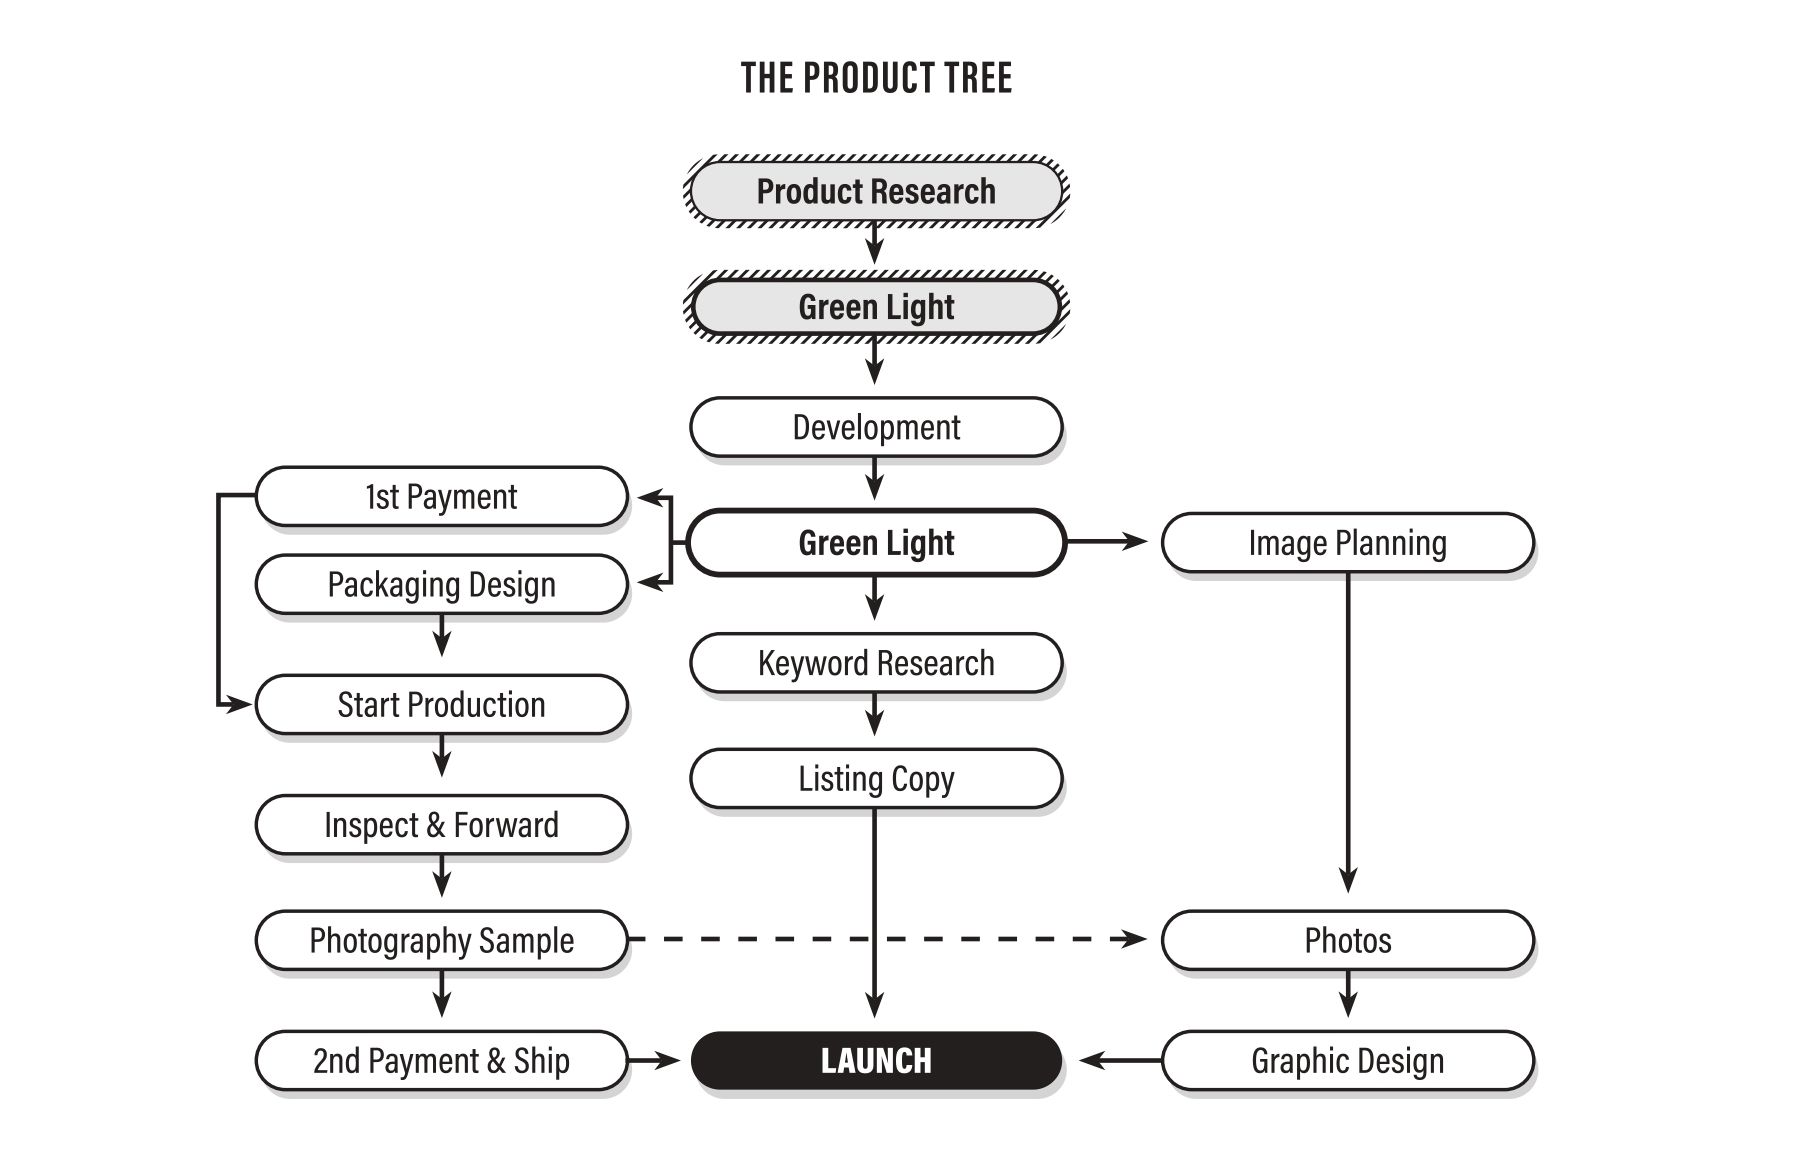
CHAPTER 2: The Product Tree
GRAPHIC 2: The Product Tree

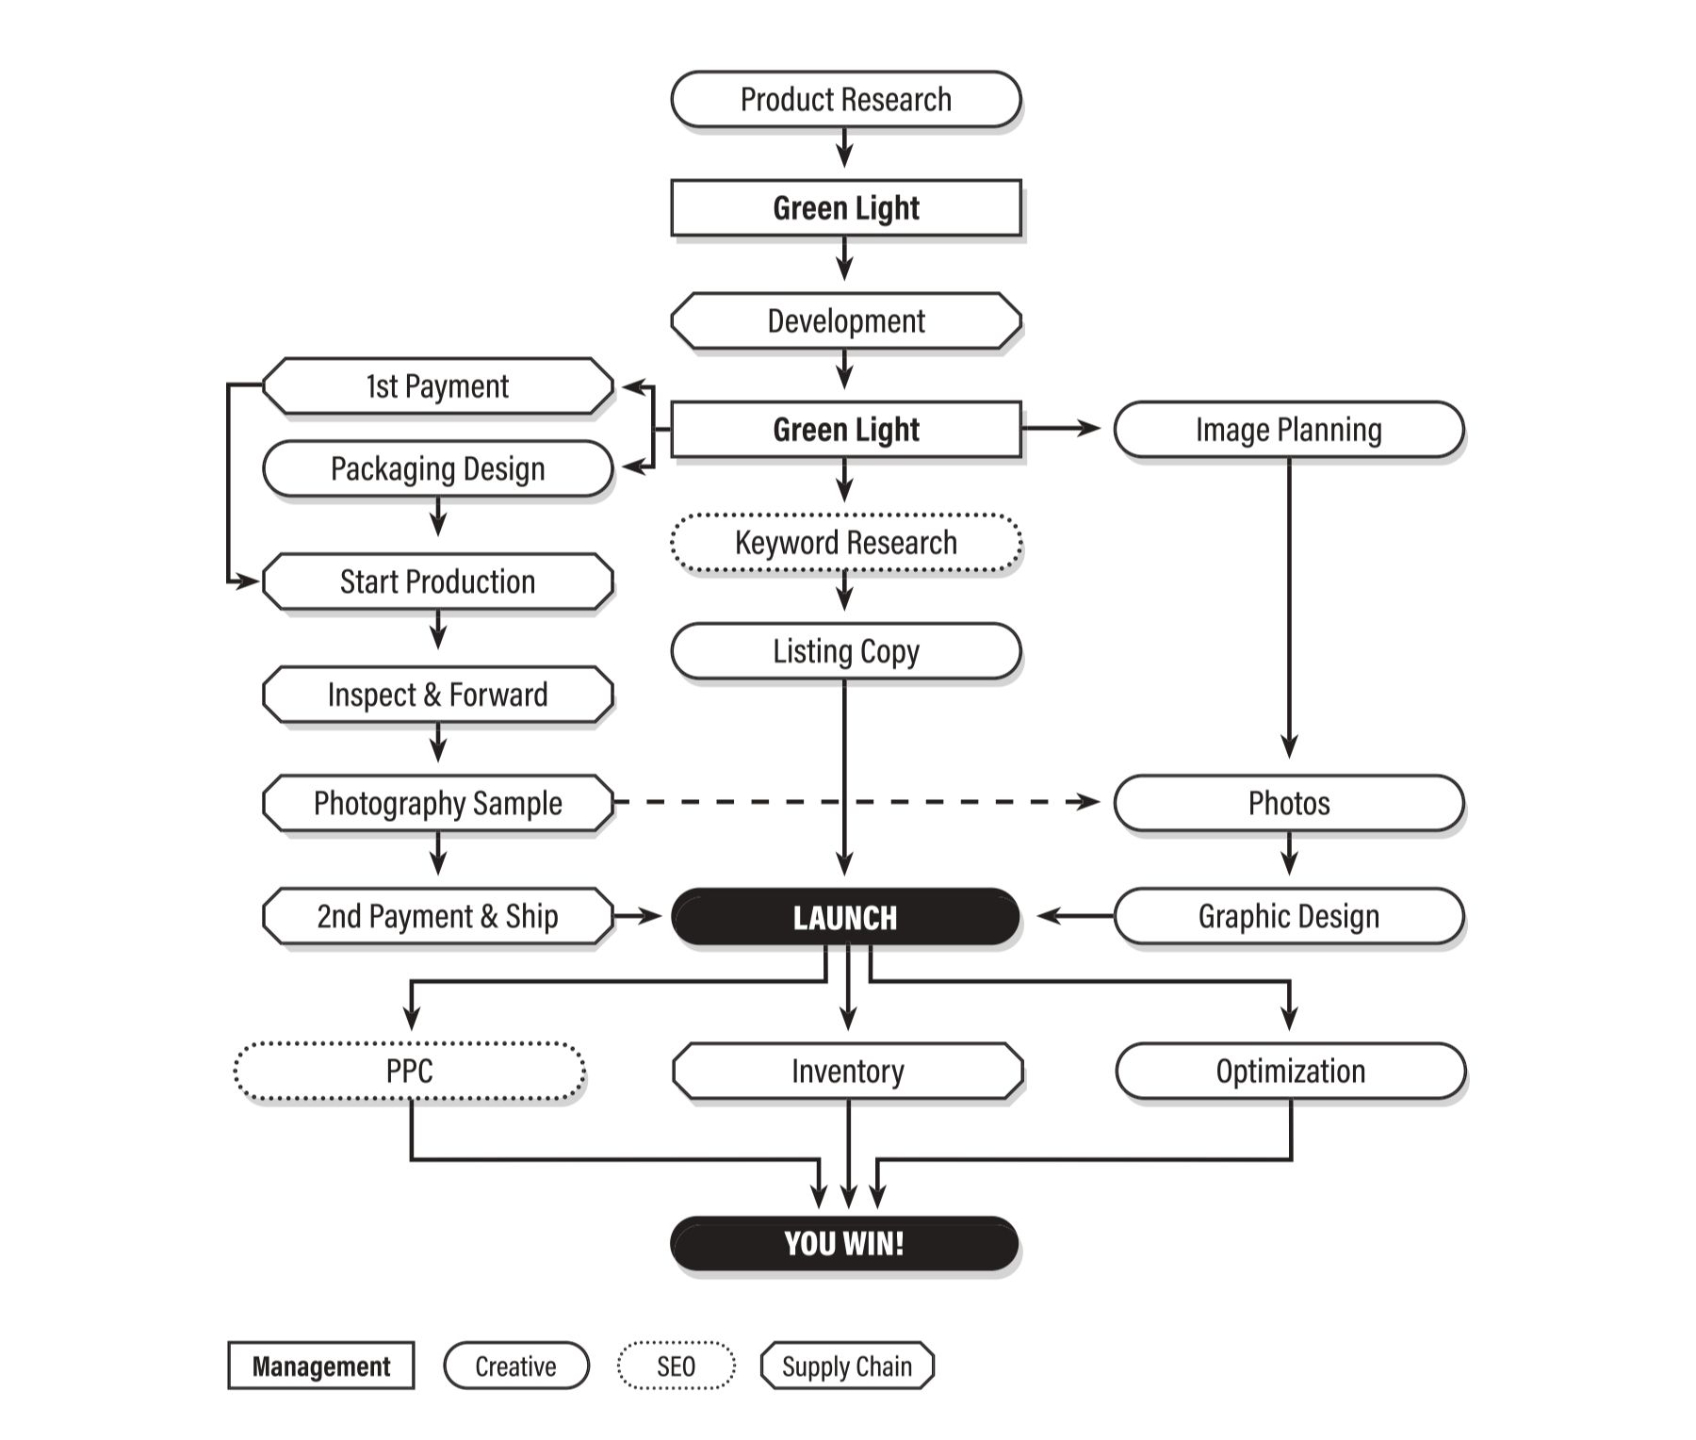
FIGURE 1: Product research is the first step in the product launch process.
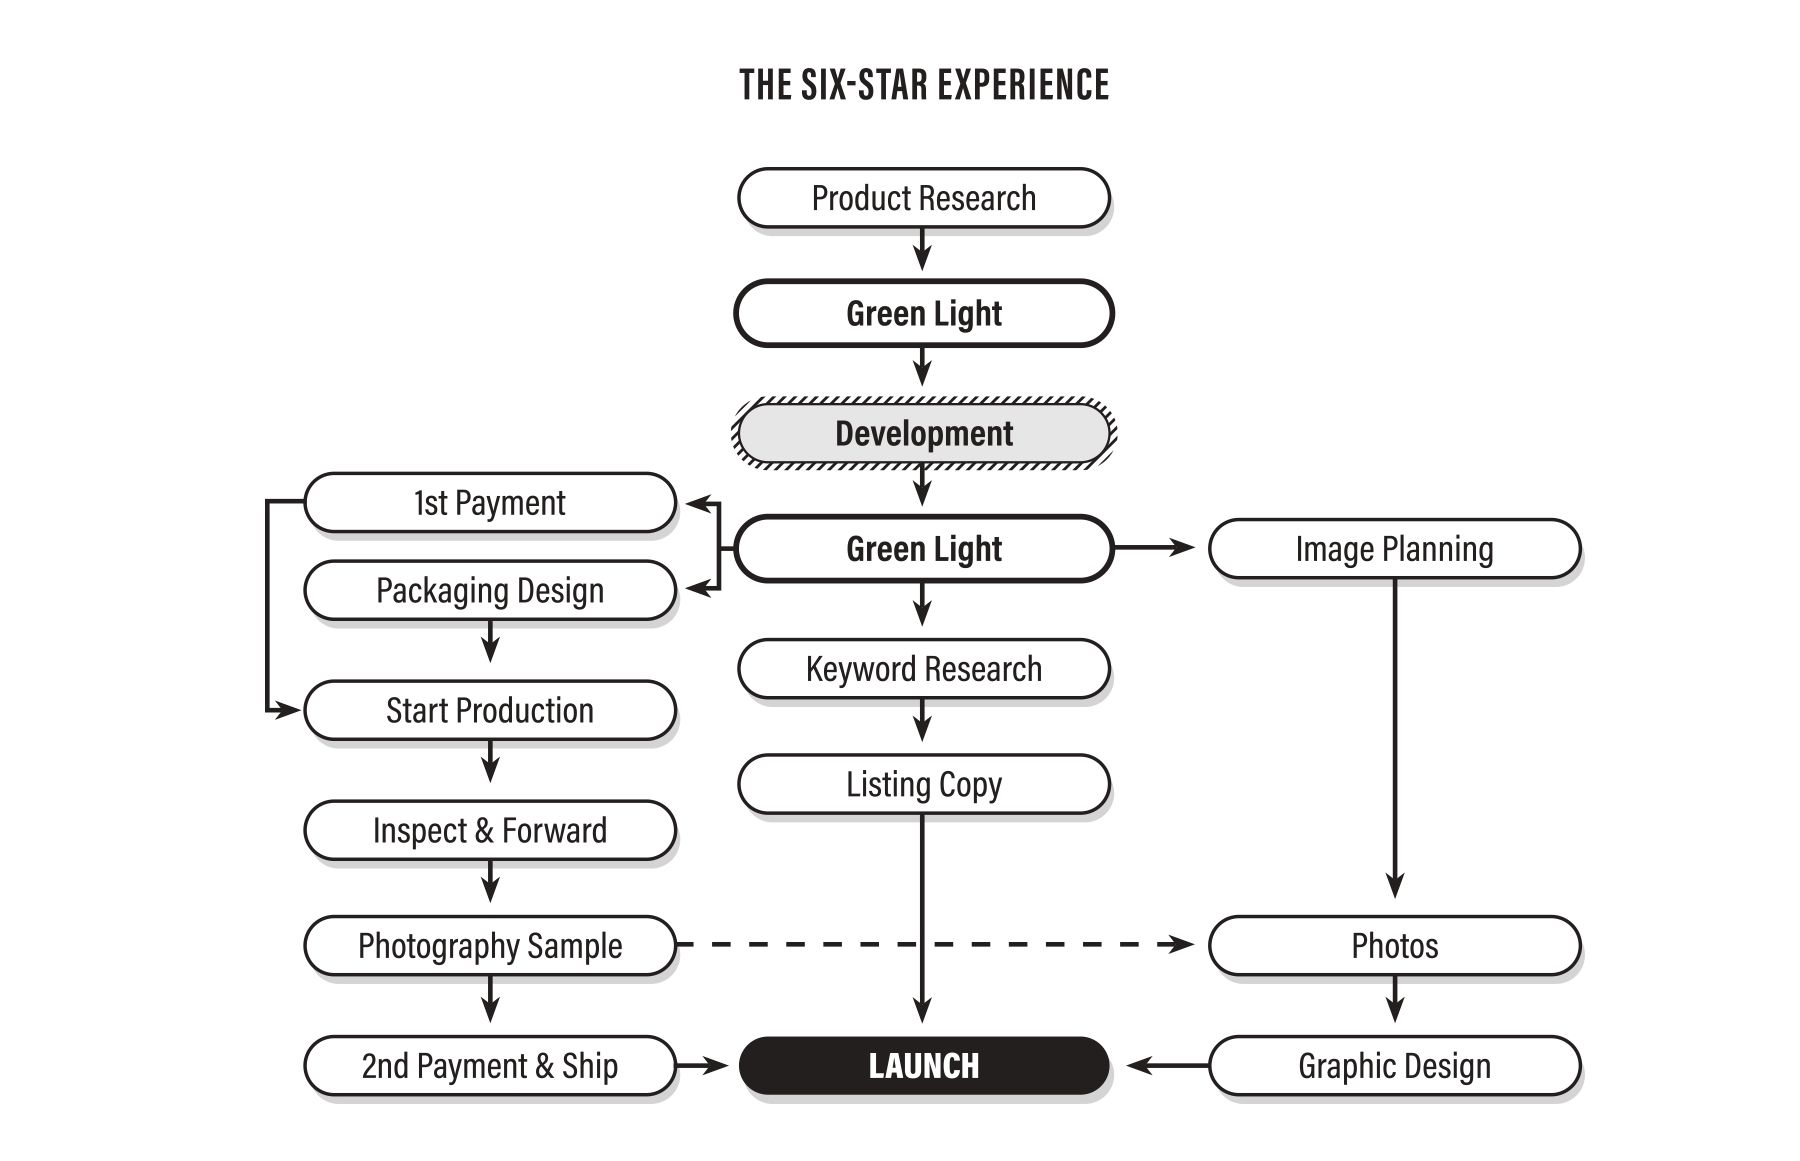
CHAPTER 3: The Six-Star Experience
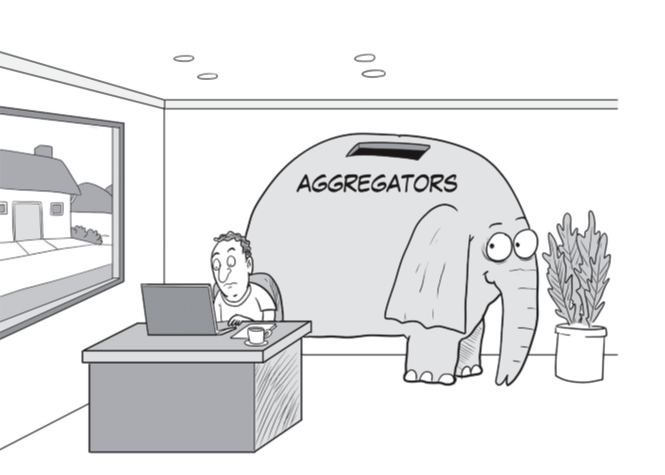
GRAPHIC 3: Amazon Reviews Needed

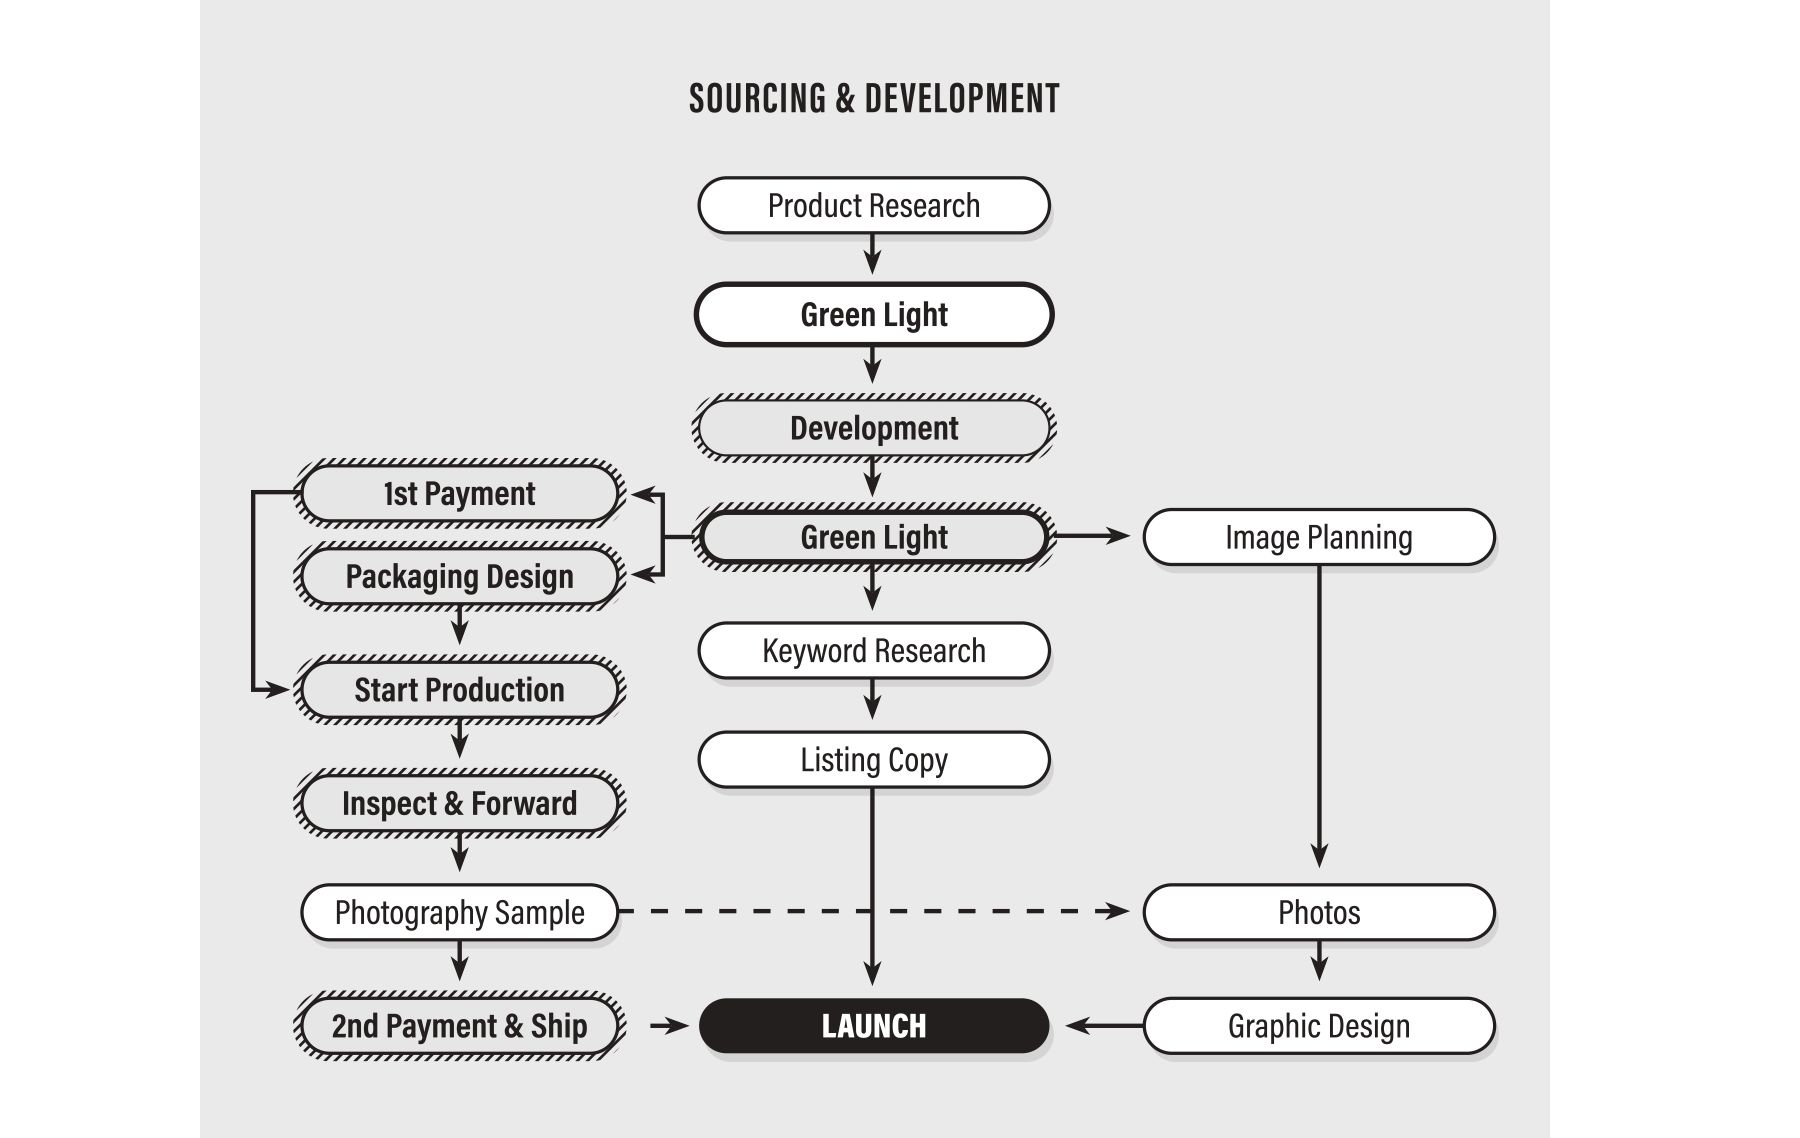
FIGURE 2: After you’ve researched your product and given it the Green Light, check with a few suppliers or other sources to get an idea of whether the product is financially viable before moving to Development and the Six-Star Formula.
GRAPHICS 4: Customer service starts when the customer experience fails.

CHAPTER 4: Underpromise, Overdeliver, and Surprise
FIGURE 3: Make a plan to underpromise and overdeliver, well before you launch a product.

CHAPTER 5: Sourcing and Development
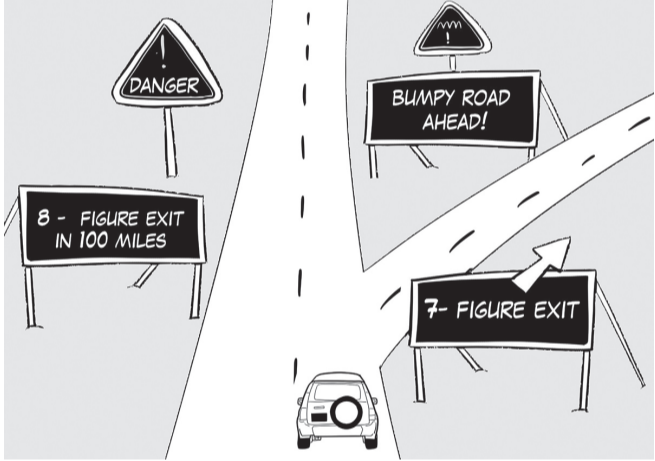
GRAPHICS 5: The smallest line I can read says "Made in China"
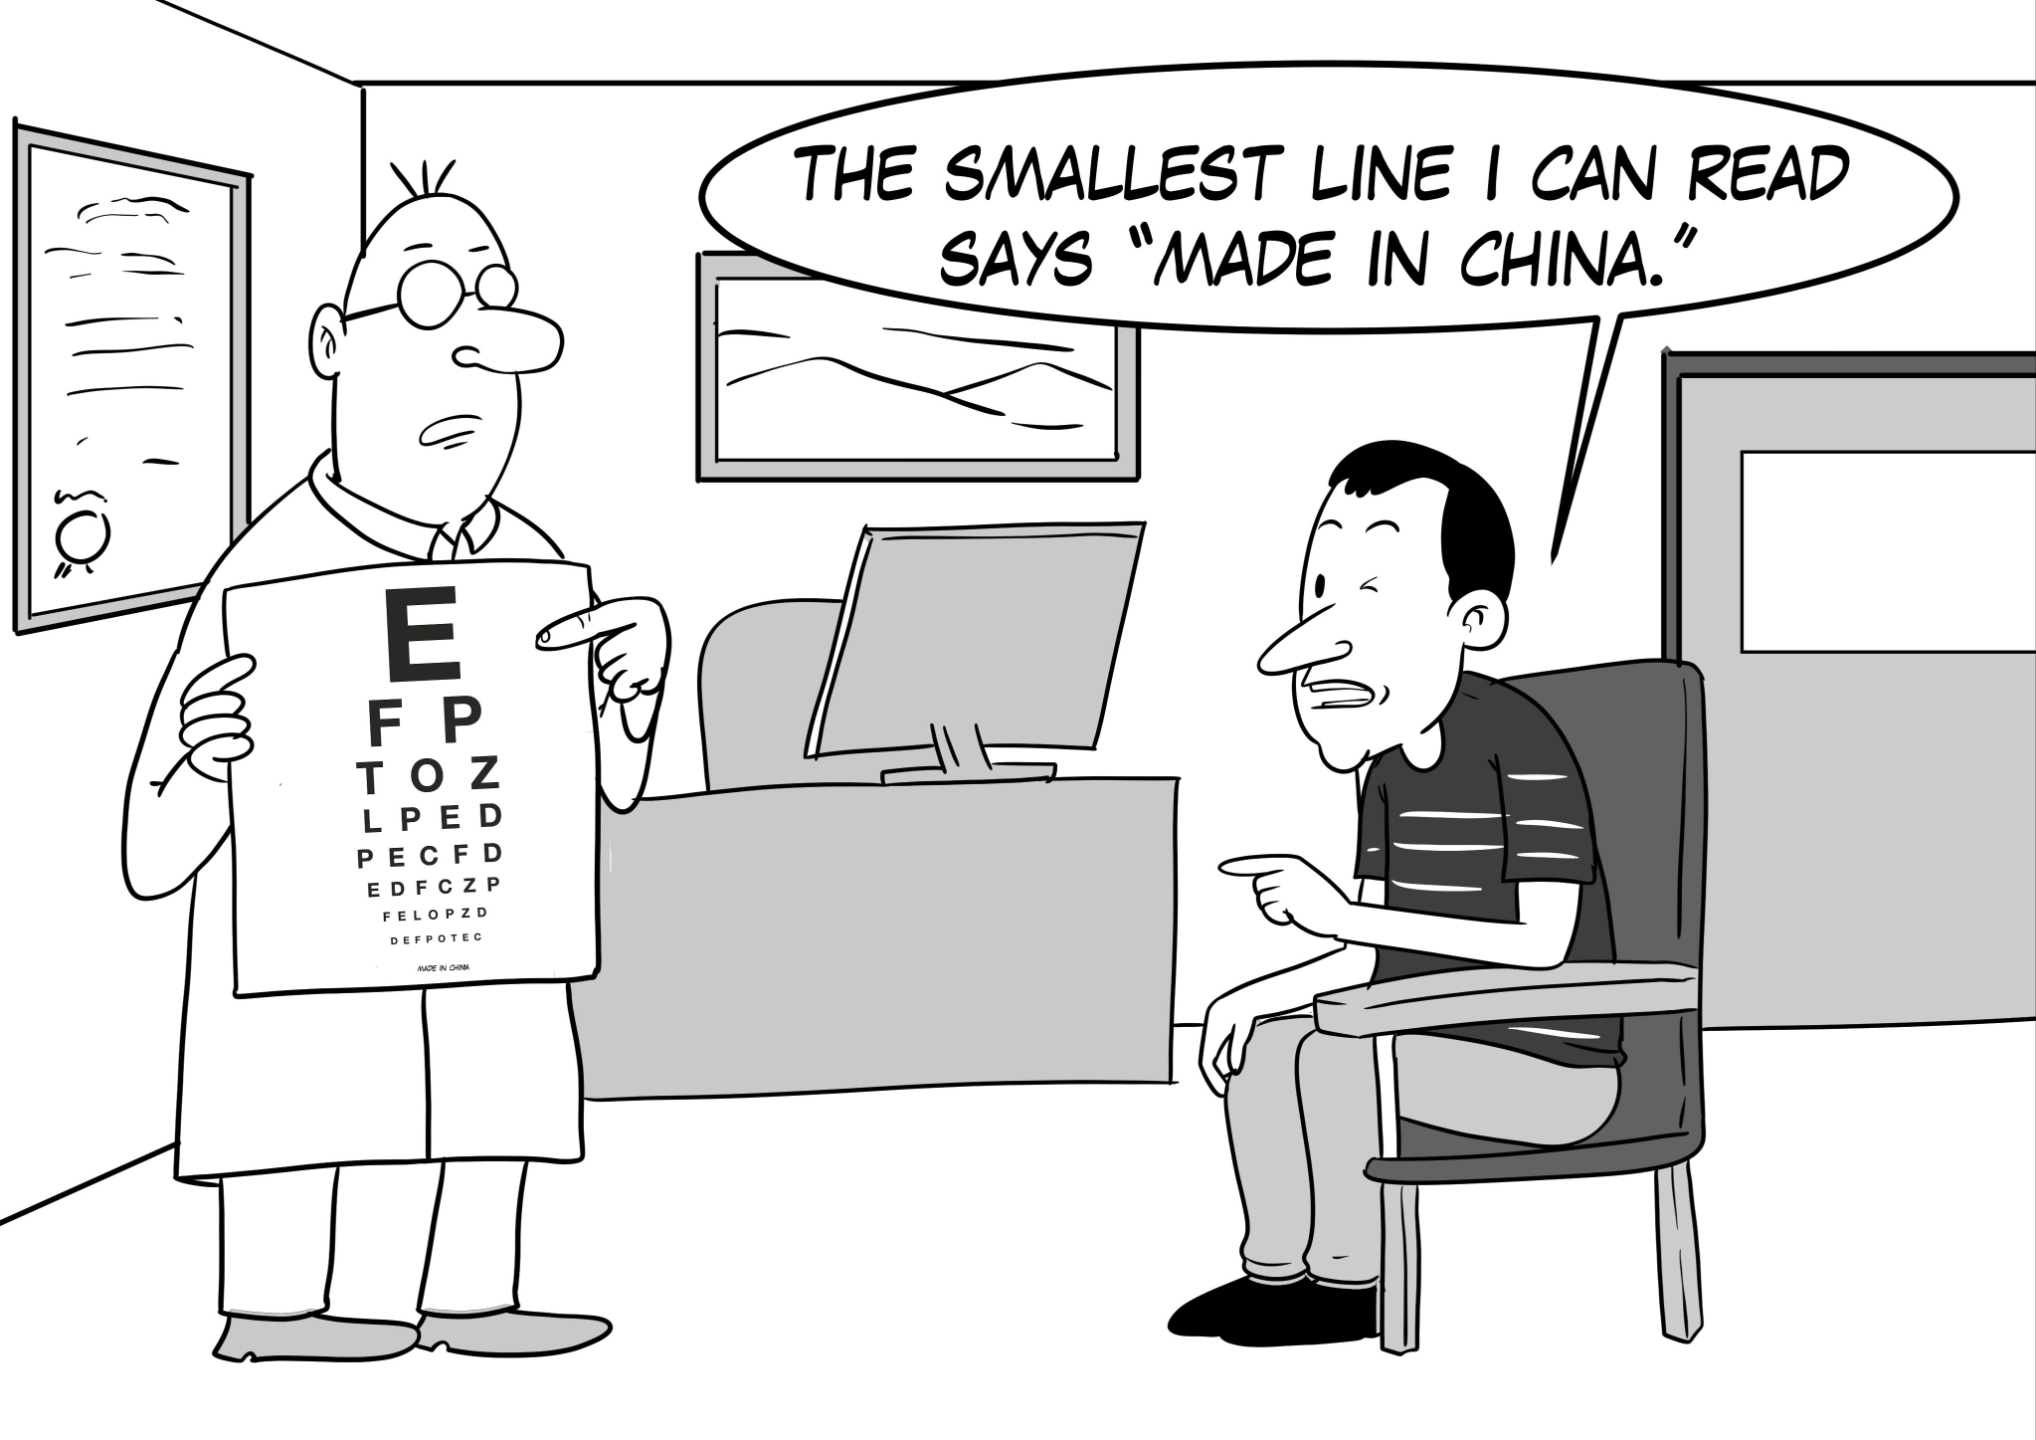
FIGURE 4: Once you have a potential product, you have to find a supplier who can get it for you. That’s where sourcing comes in.
CHAPTER 6: Make It Better
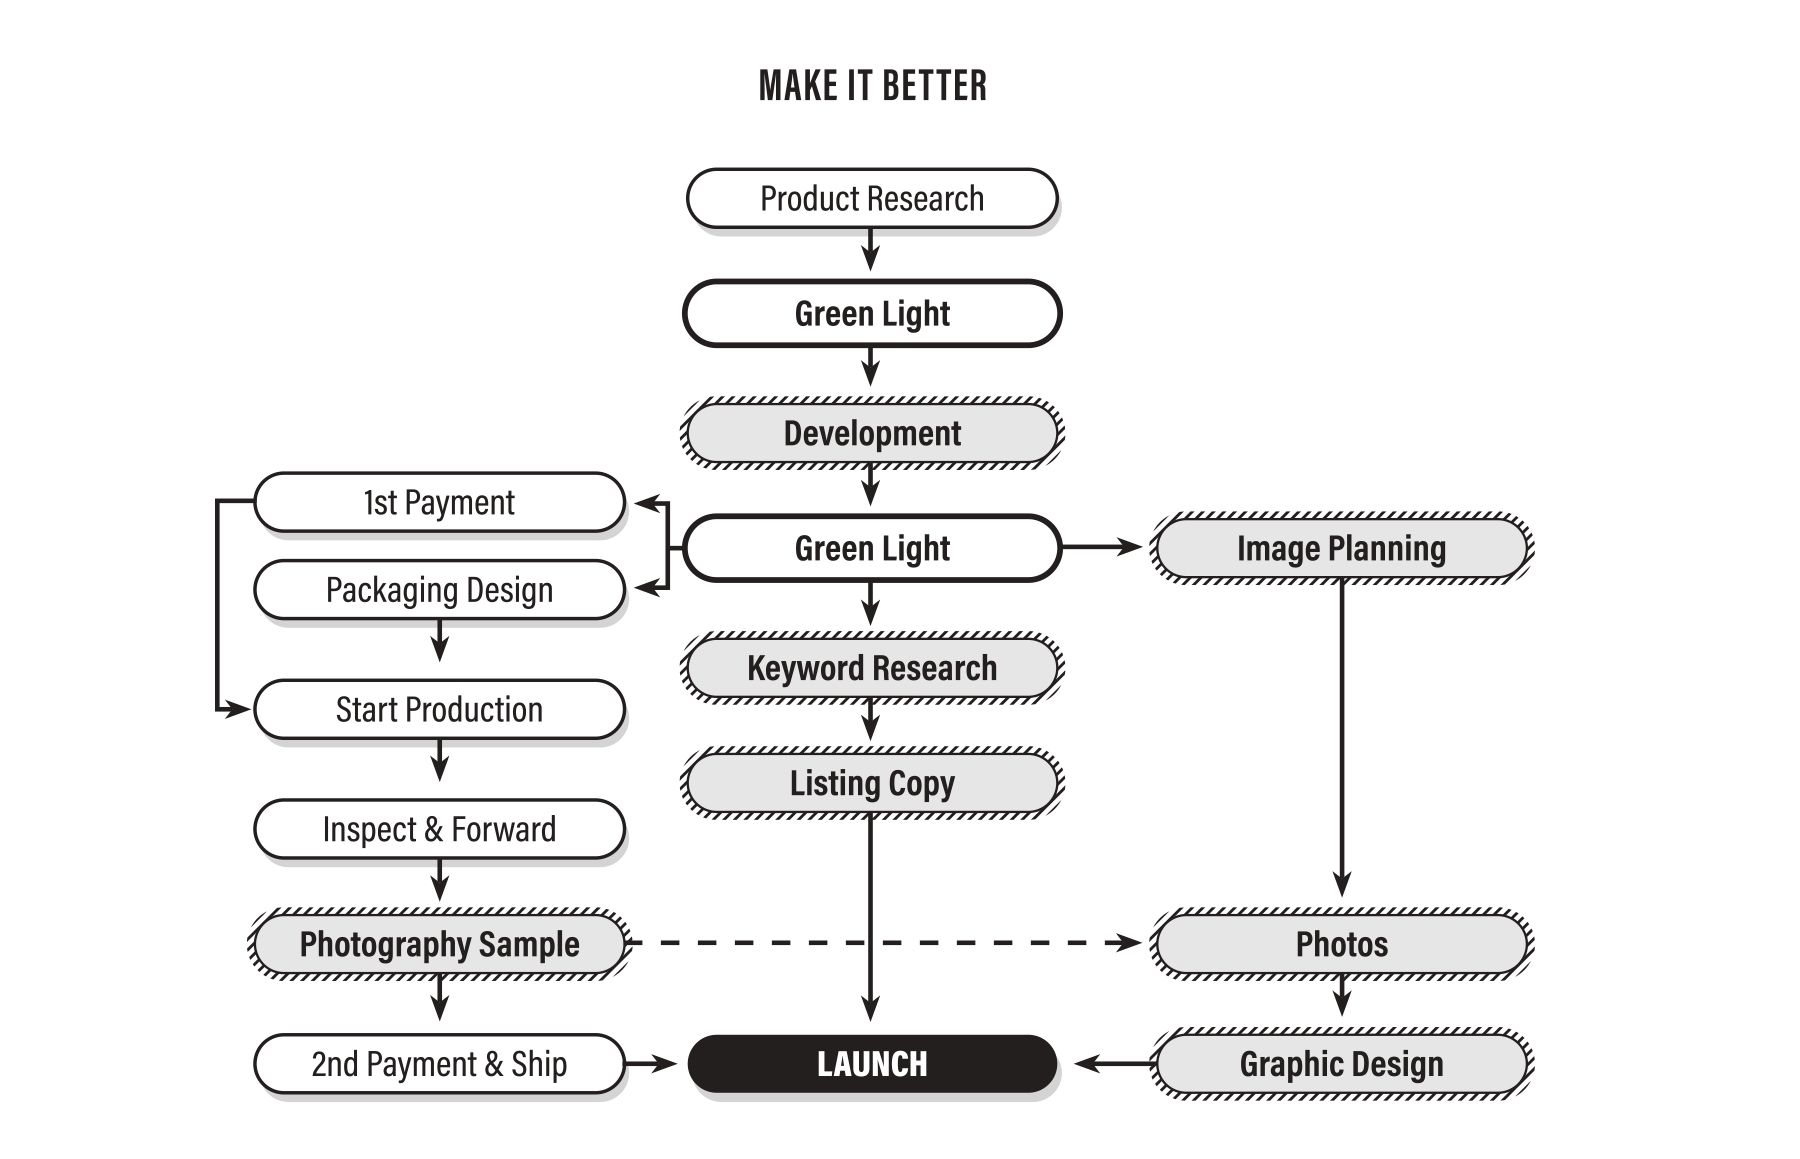
FIGURE 5: You’ll have a number of tasks to complete in the Make It Better phase before you can launch your product.
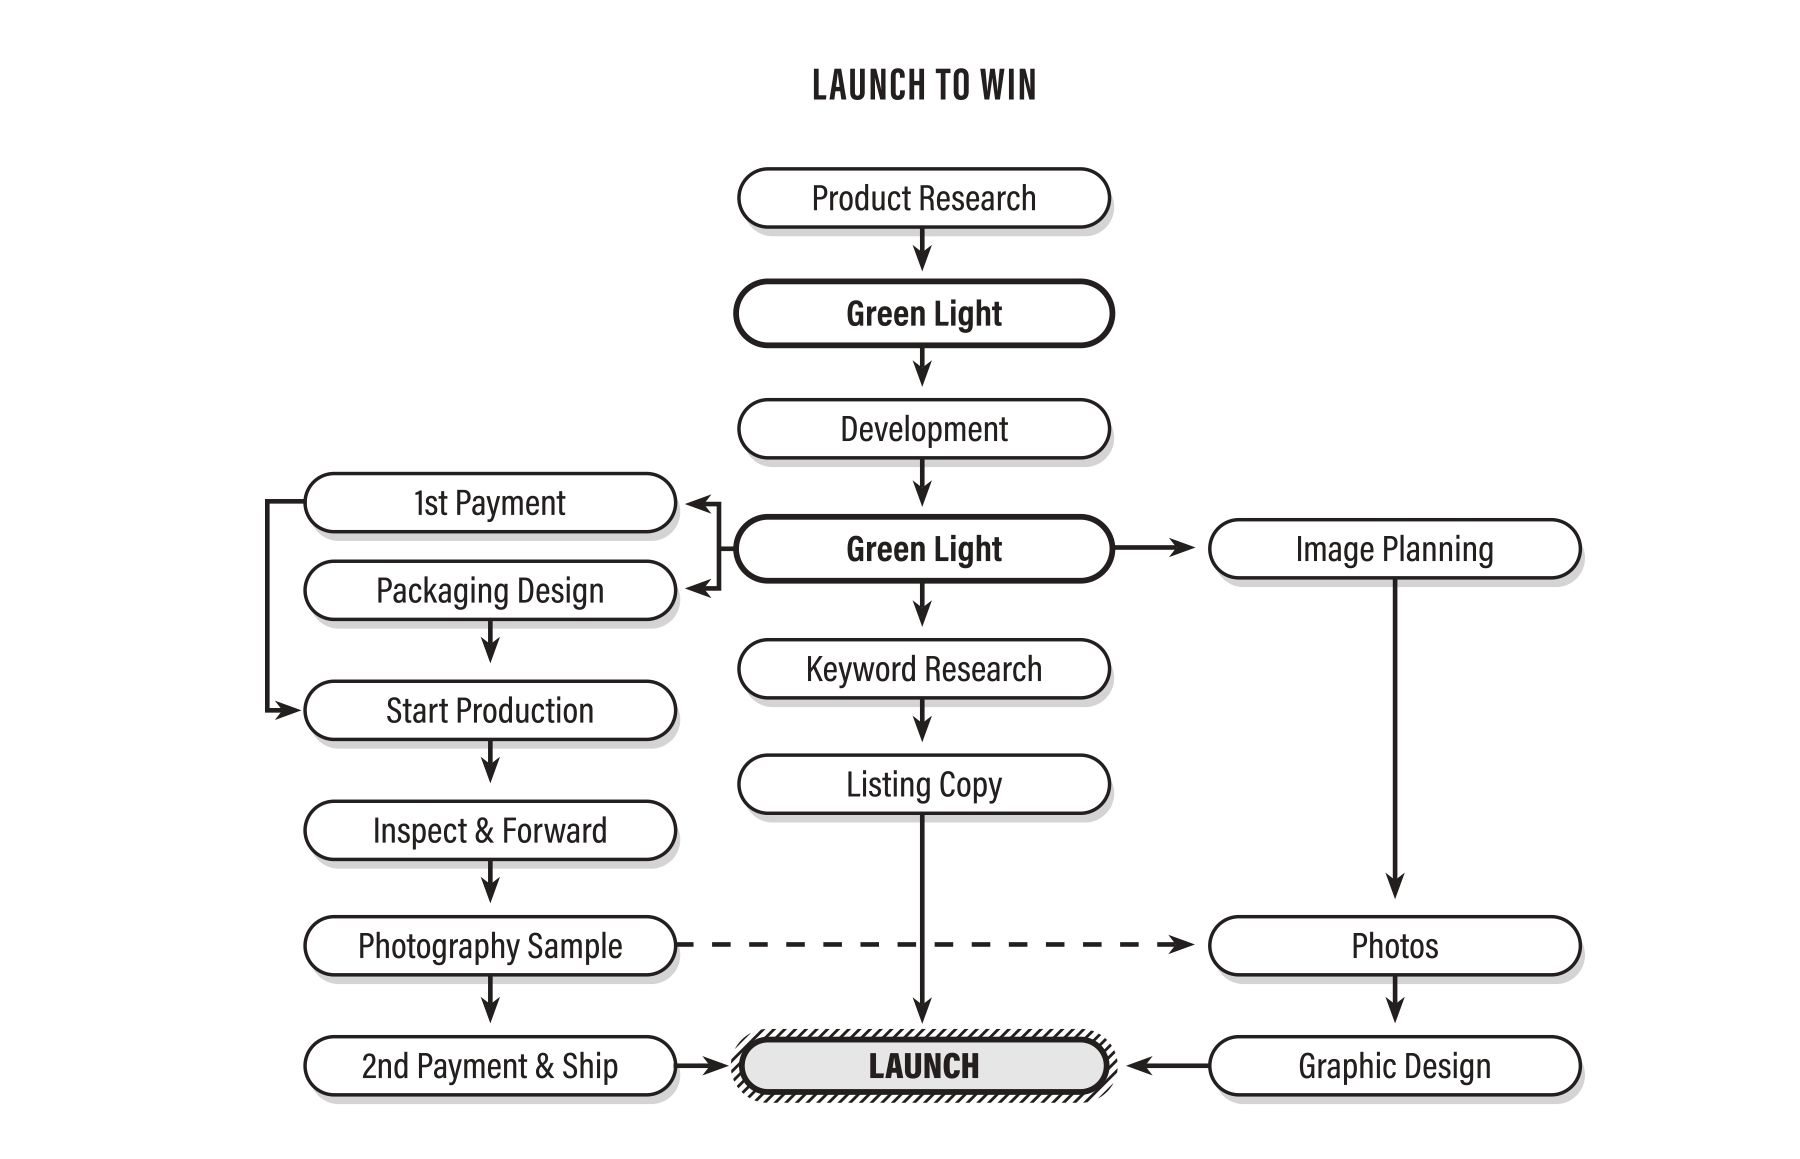
CHAPTER 7: Launch to Win
GRAPHICS 6: Aim to have all of your ducks in a row.
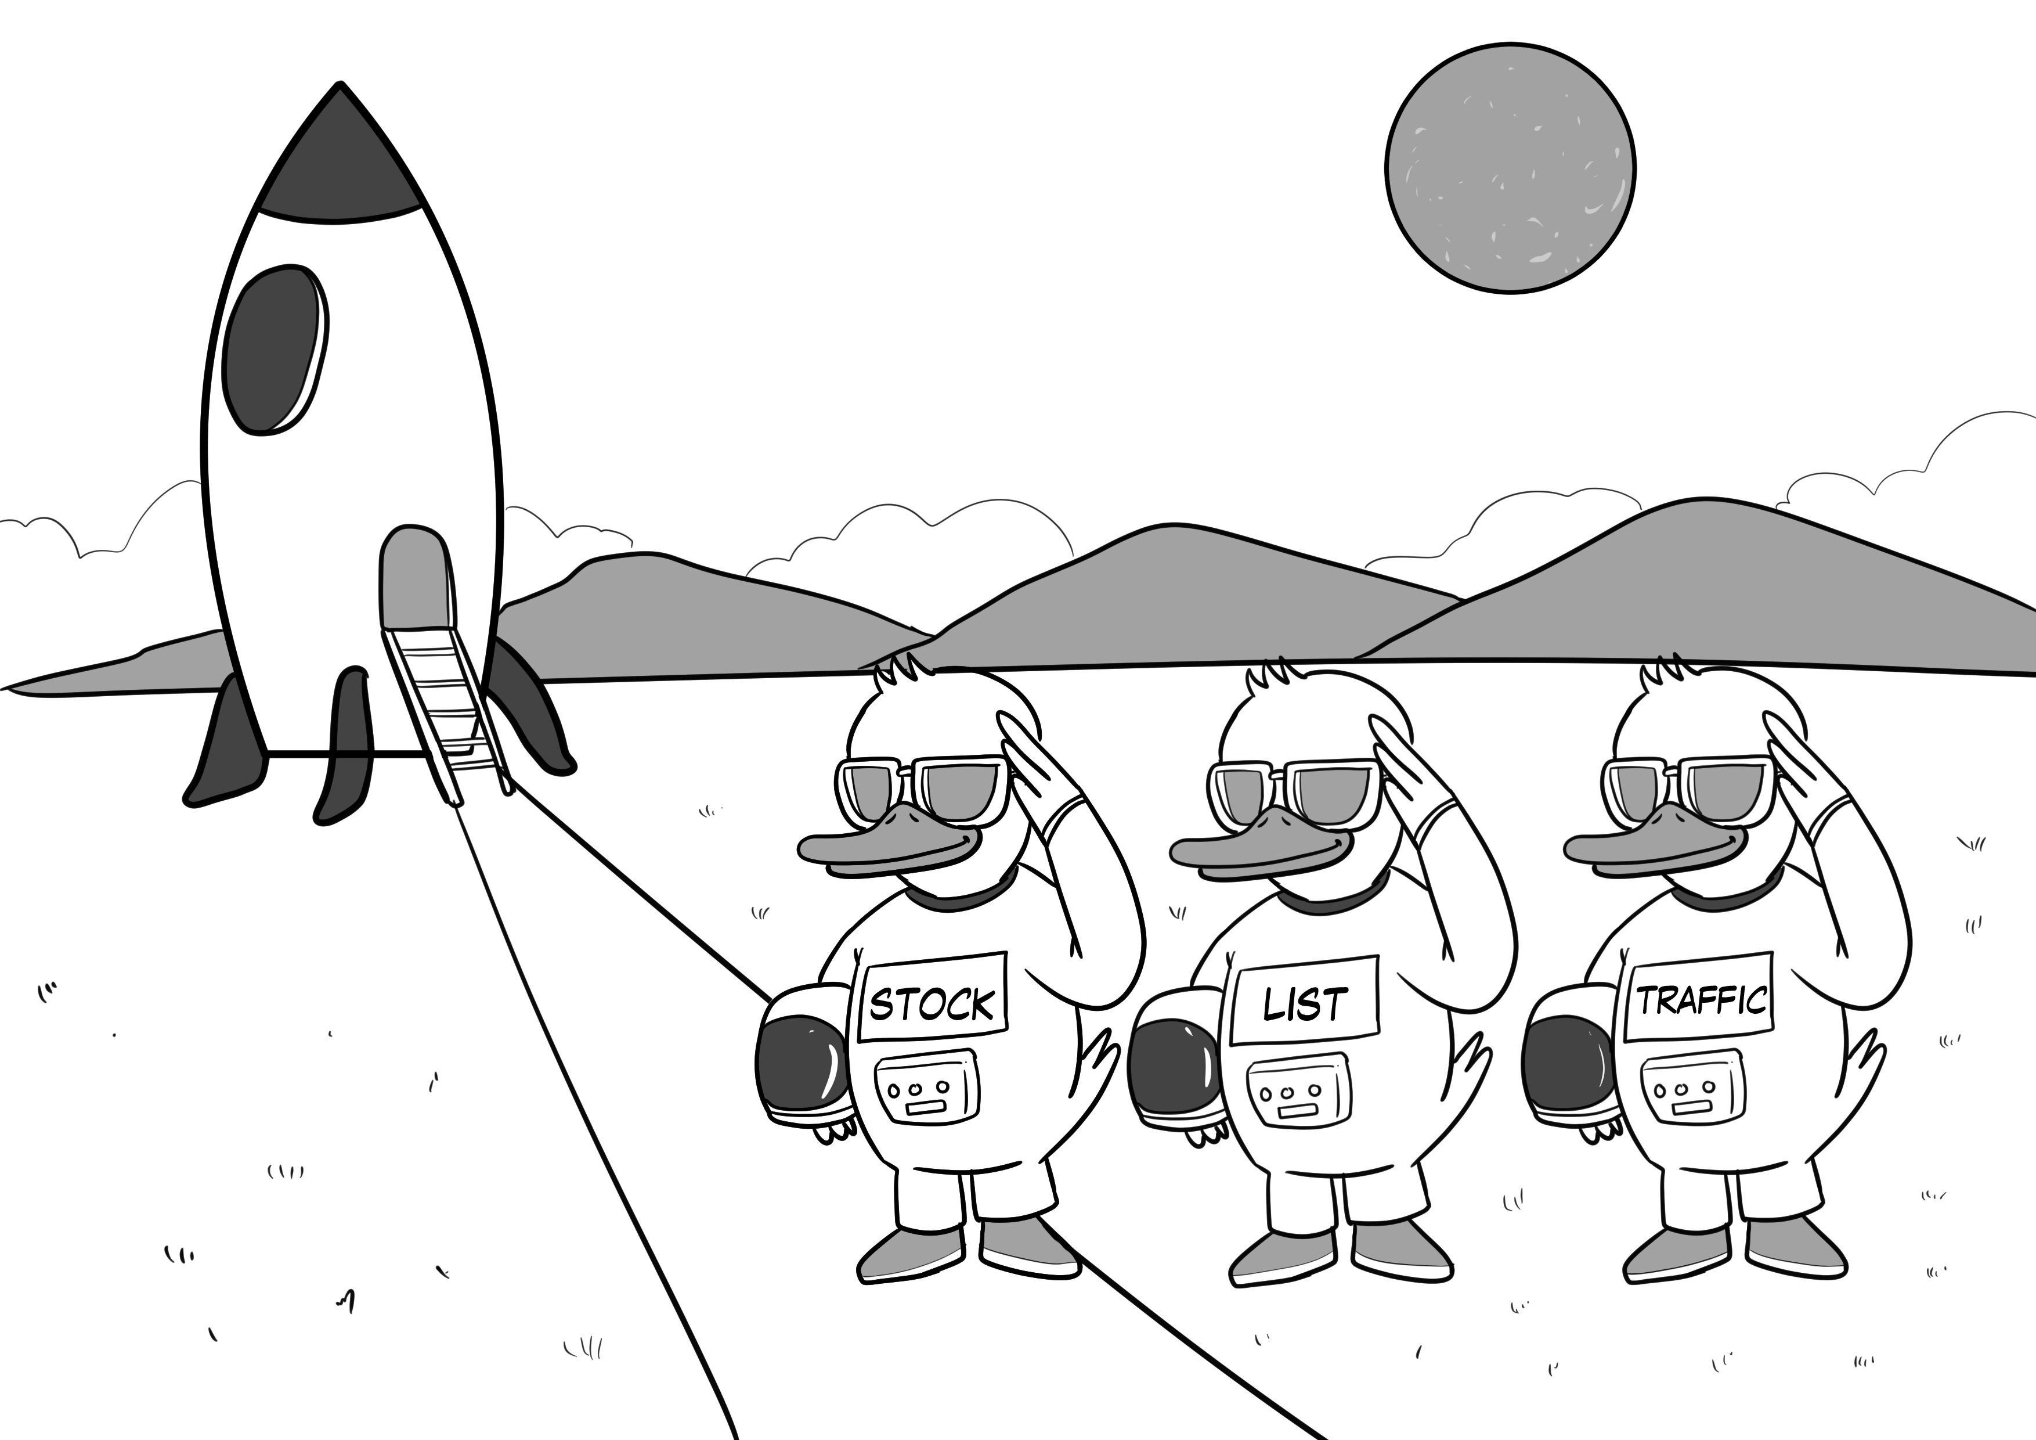
FIGURE 6: After all your hard work, the big day is finally here—launch time.
CHAPTER 8: Pay Per Click
FIGURE 7: Pay per click is one of three areas that you need to focus on to go from product launch to winning.
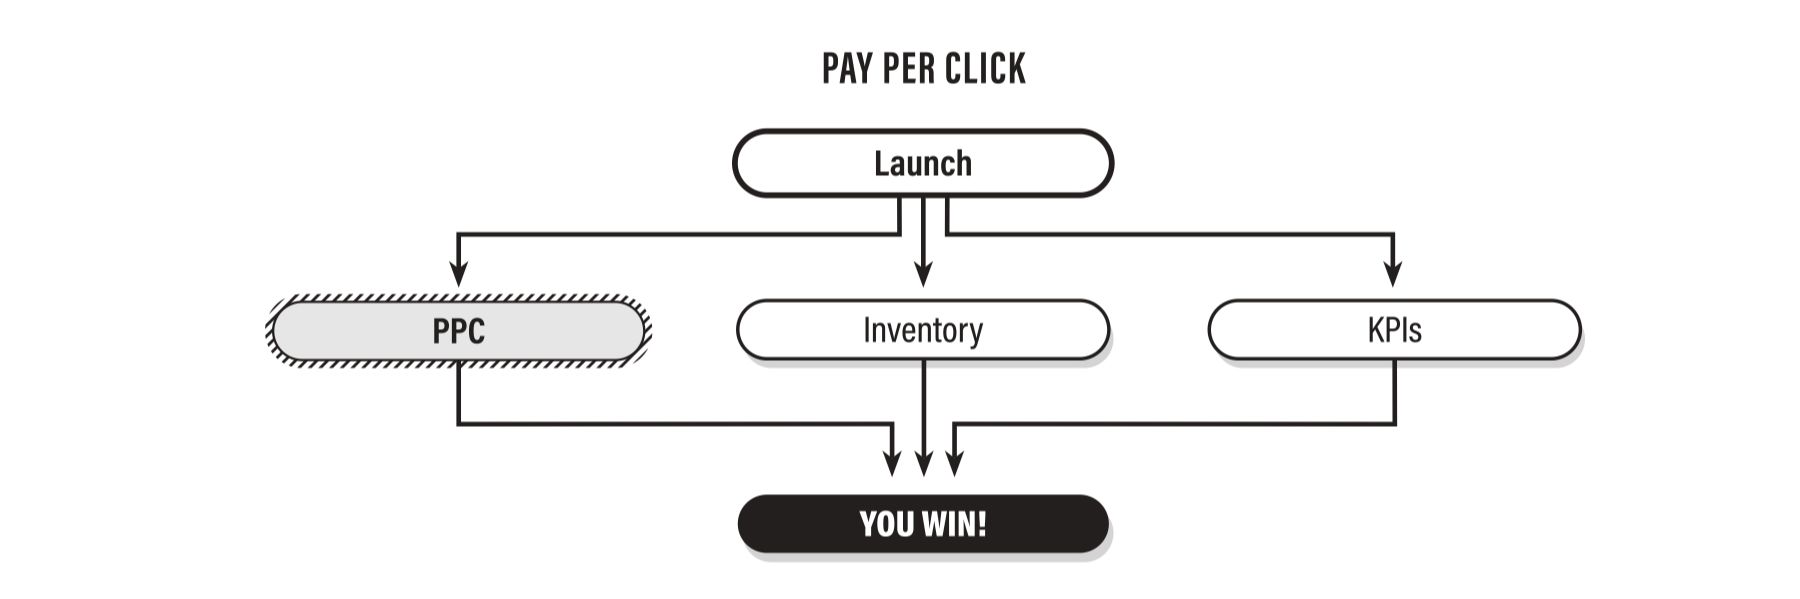
GRAPHICS 7: PPC - 2 for 1

CHAPTER 9: Inventory Management
FIGURE 8: Inventory management is a critical task in your journey from product launch to winning.
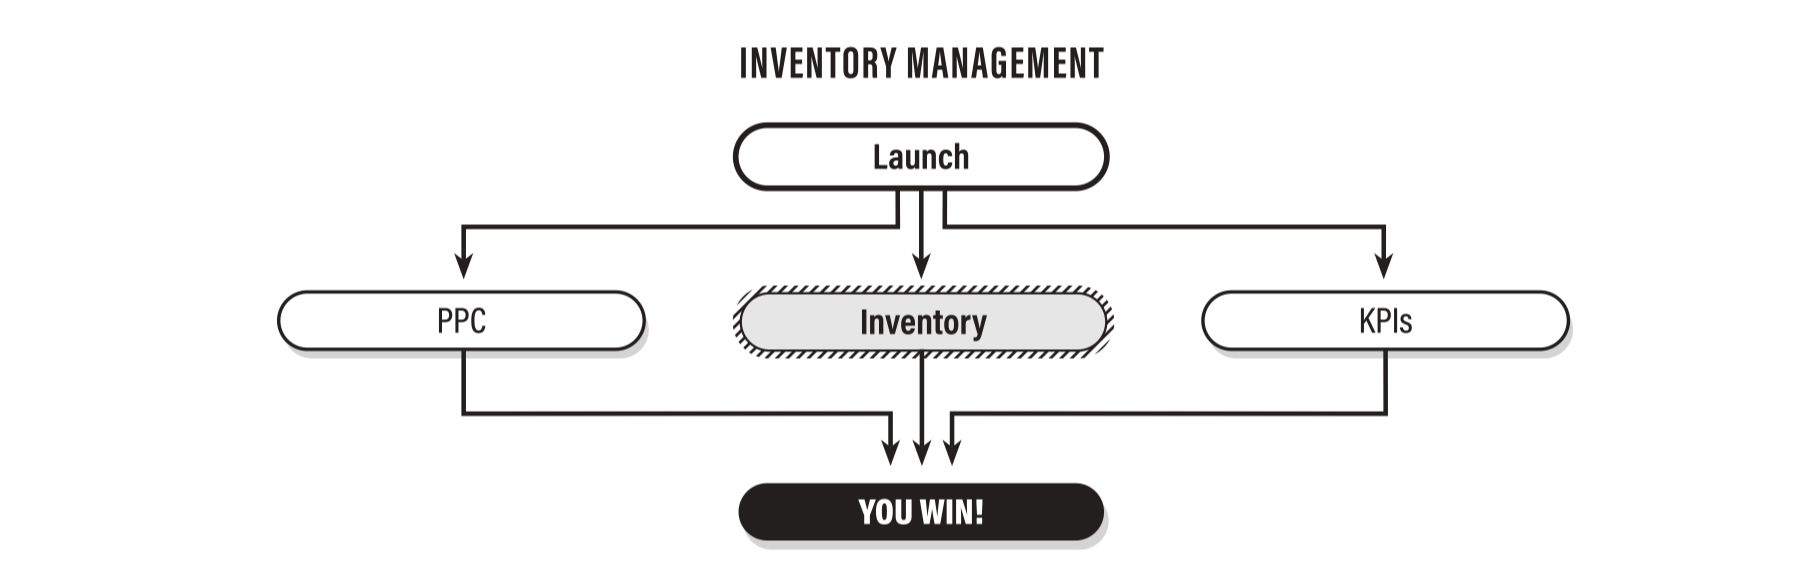
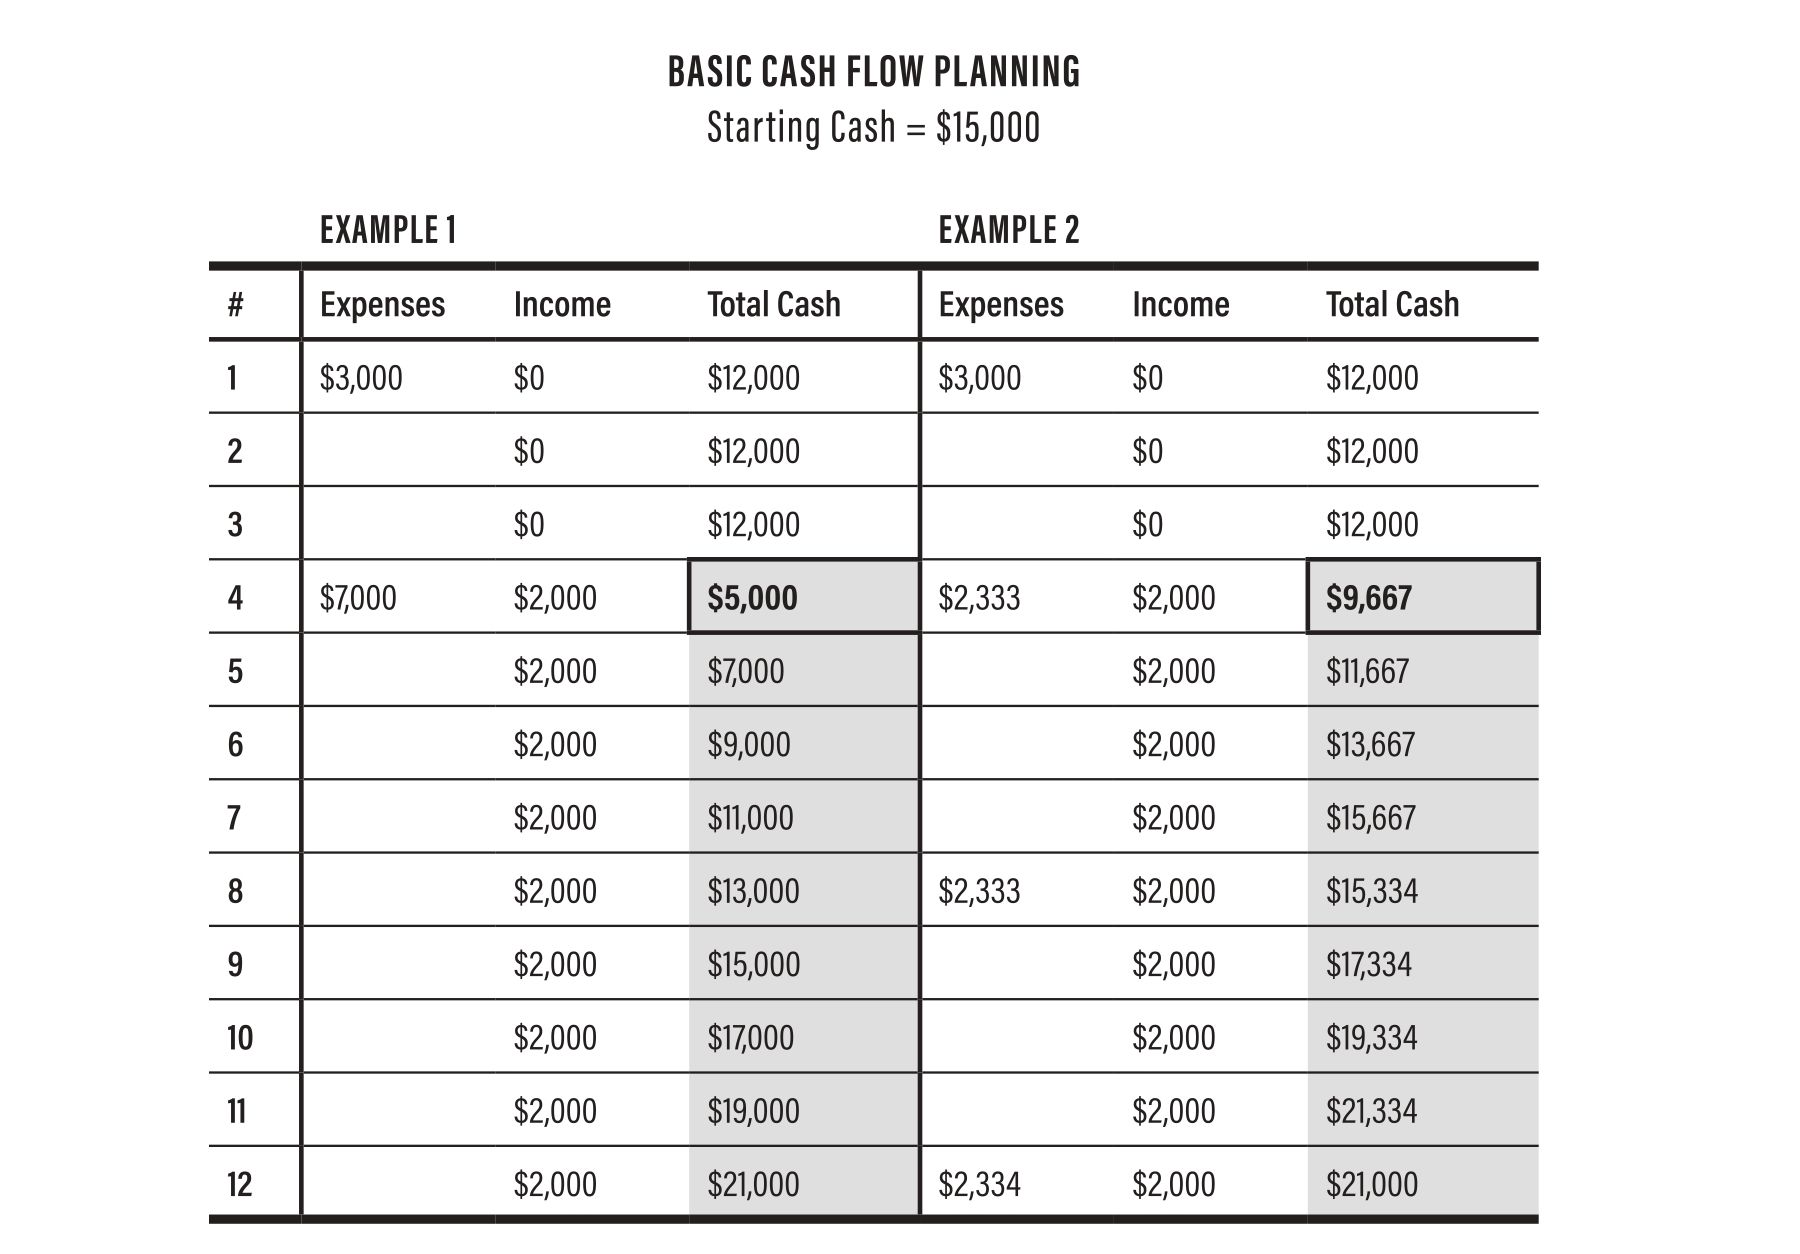
FIGURE 9: Inventory management doesn’t just prevent you from overstocking or running out of stock—it also affects your cash flow.
GRAPHICS 8: Shipping Methods

CHAPTER 10: Key Performance Indicators
GRAPHICS 9: Units Sold per Day, Profit, and ROI
CHAPTER 11: Balance the Scale
FIGURE 11: As a Driver, you drive your company for better or for worse. You make all the decisions and take all the actions. You might also be the bottleneck. In this example, the nonshaded box indicates just one employee: Customer Service.
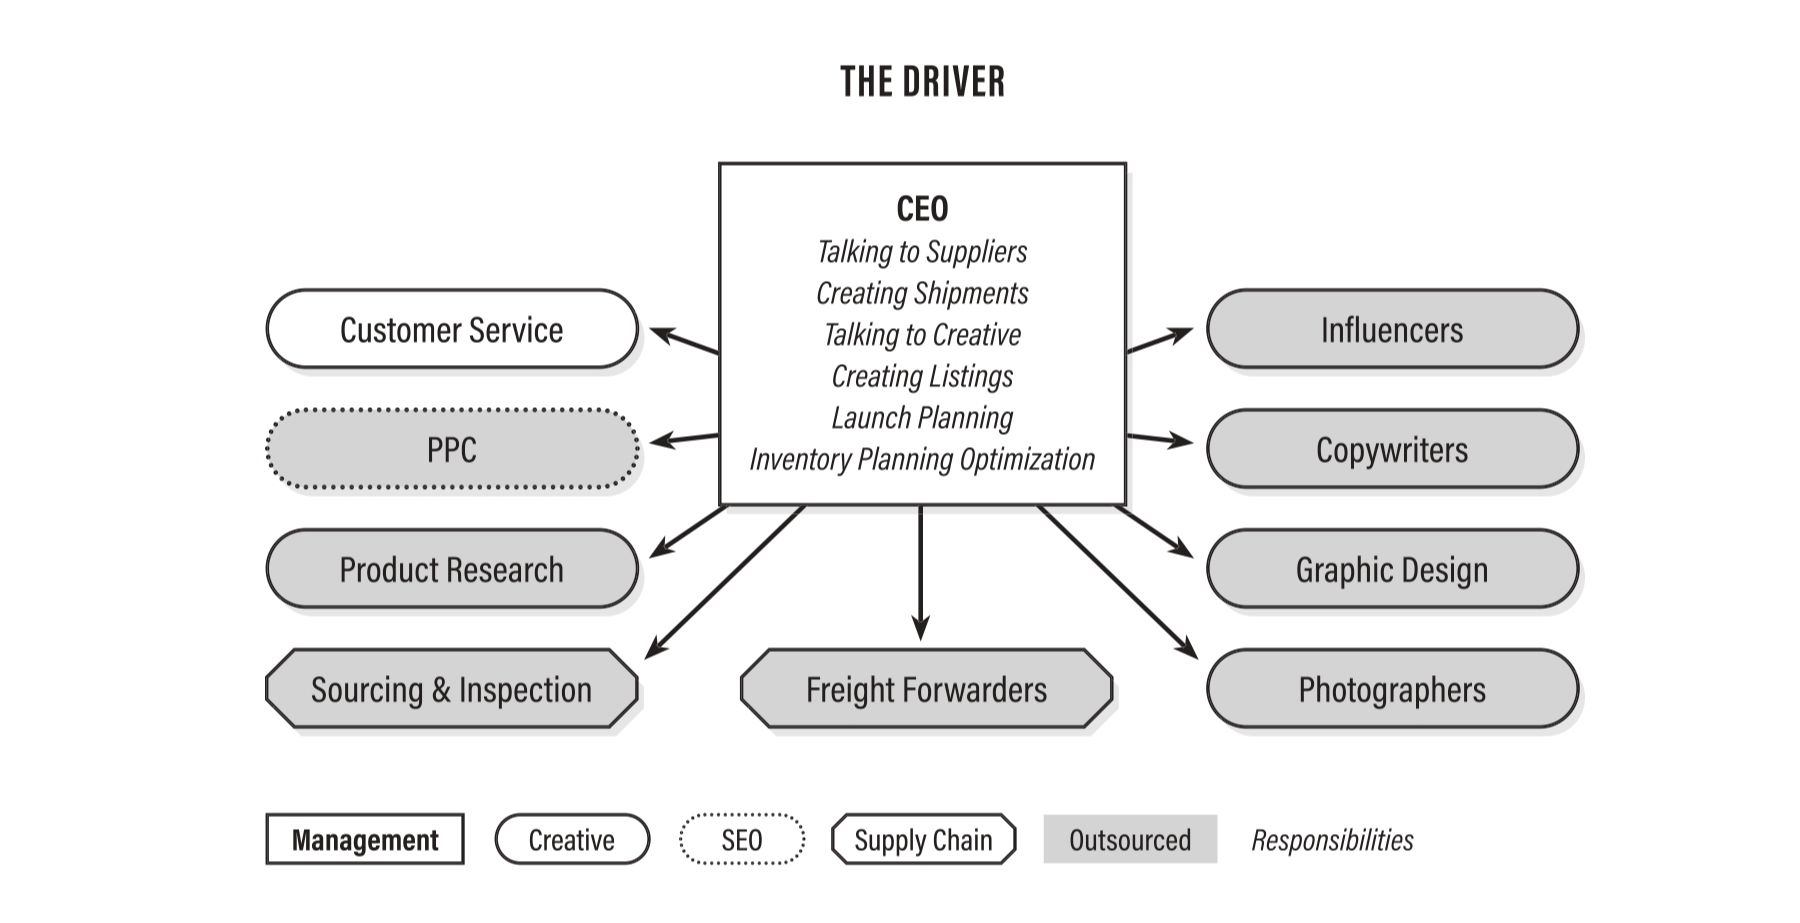
GRAPHIC 11: Driver Structure
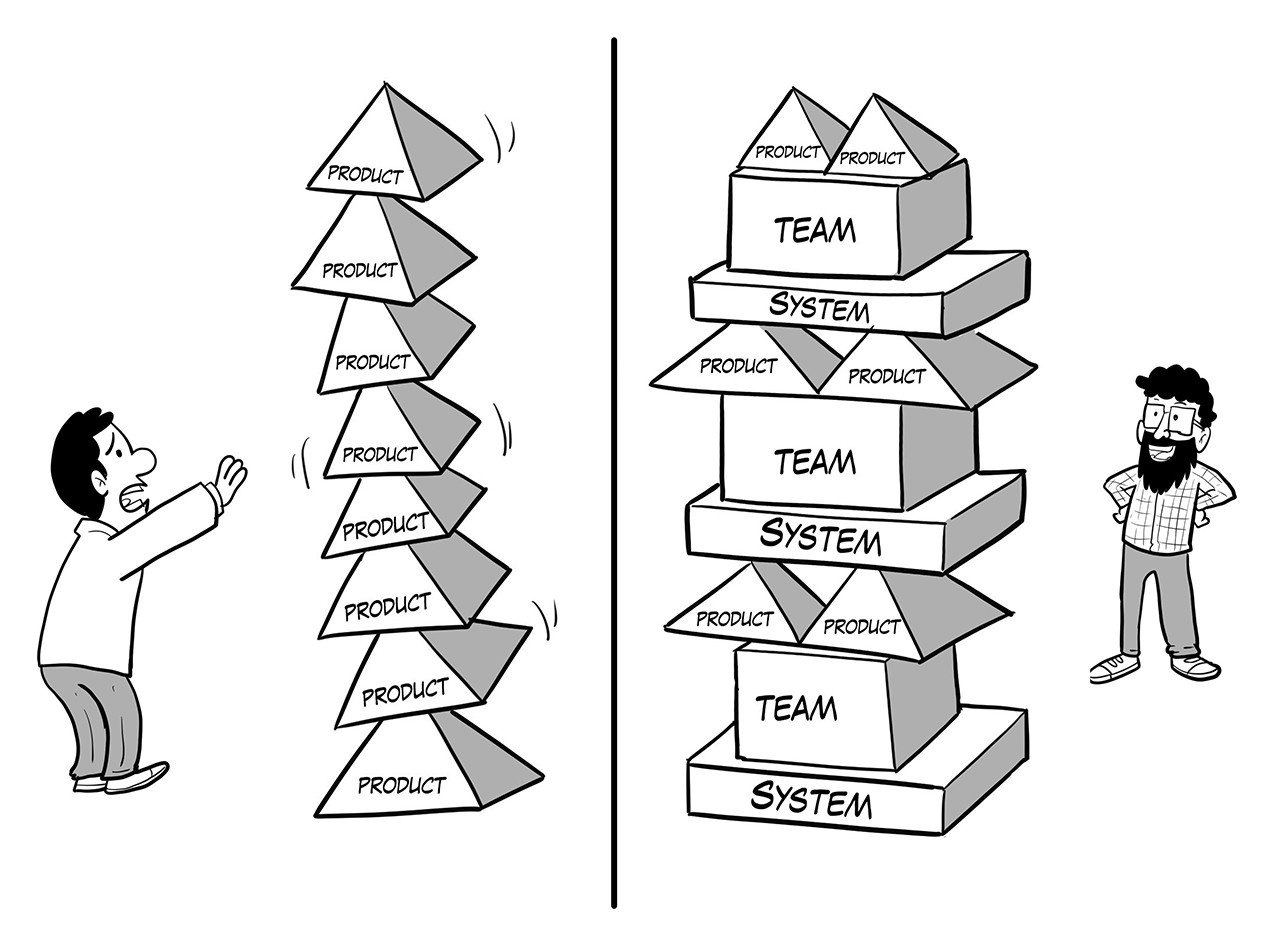
FIGURE 12: As a Driving Instructor, you’re still in charge, but you aren’t doing all the work. In this example, the nonshaded boxes indicate five employees: Social Media, Customer Service, PPC, Product Research, and Inventory.
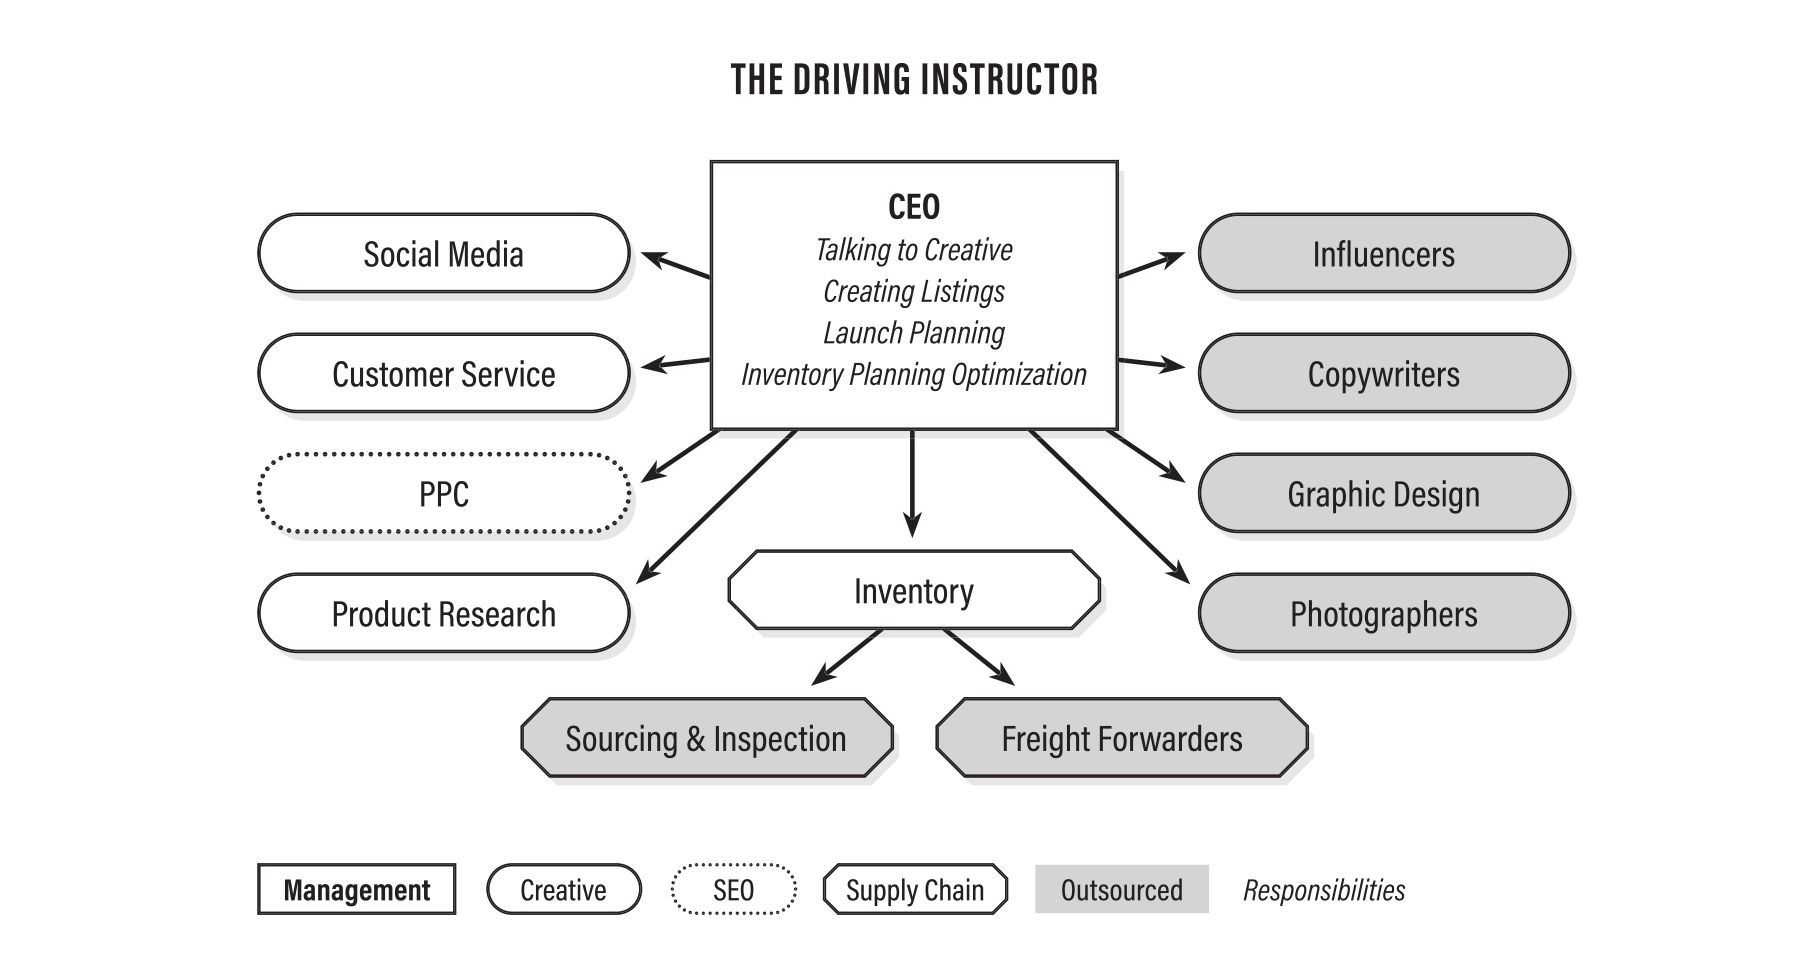
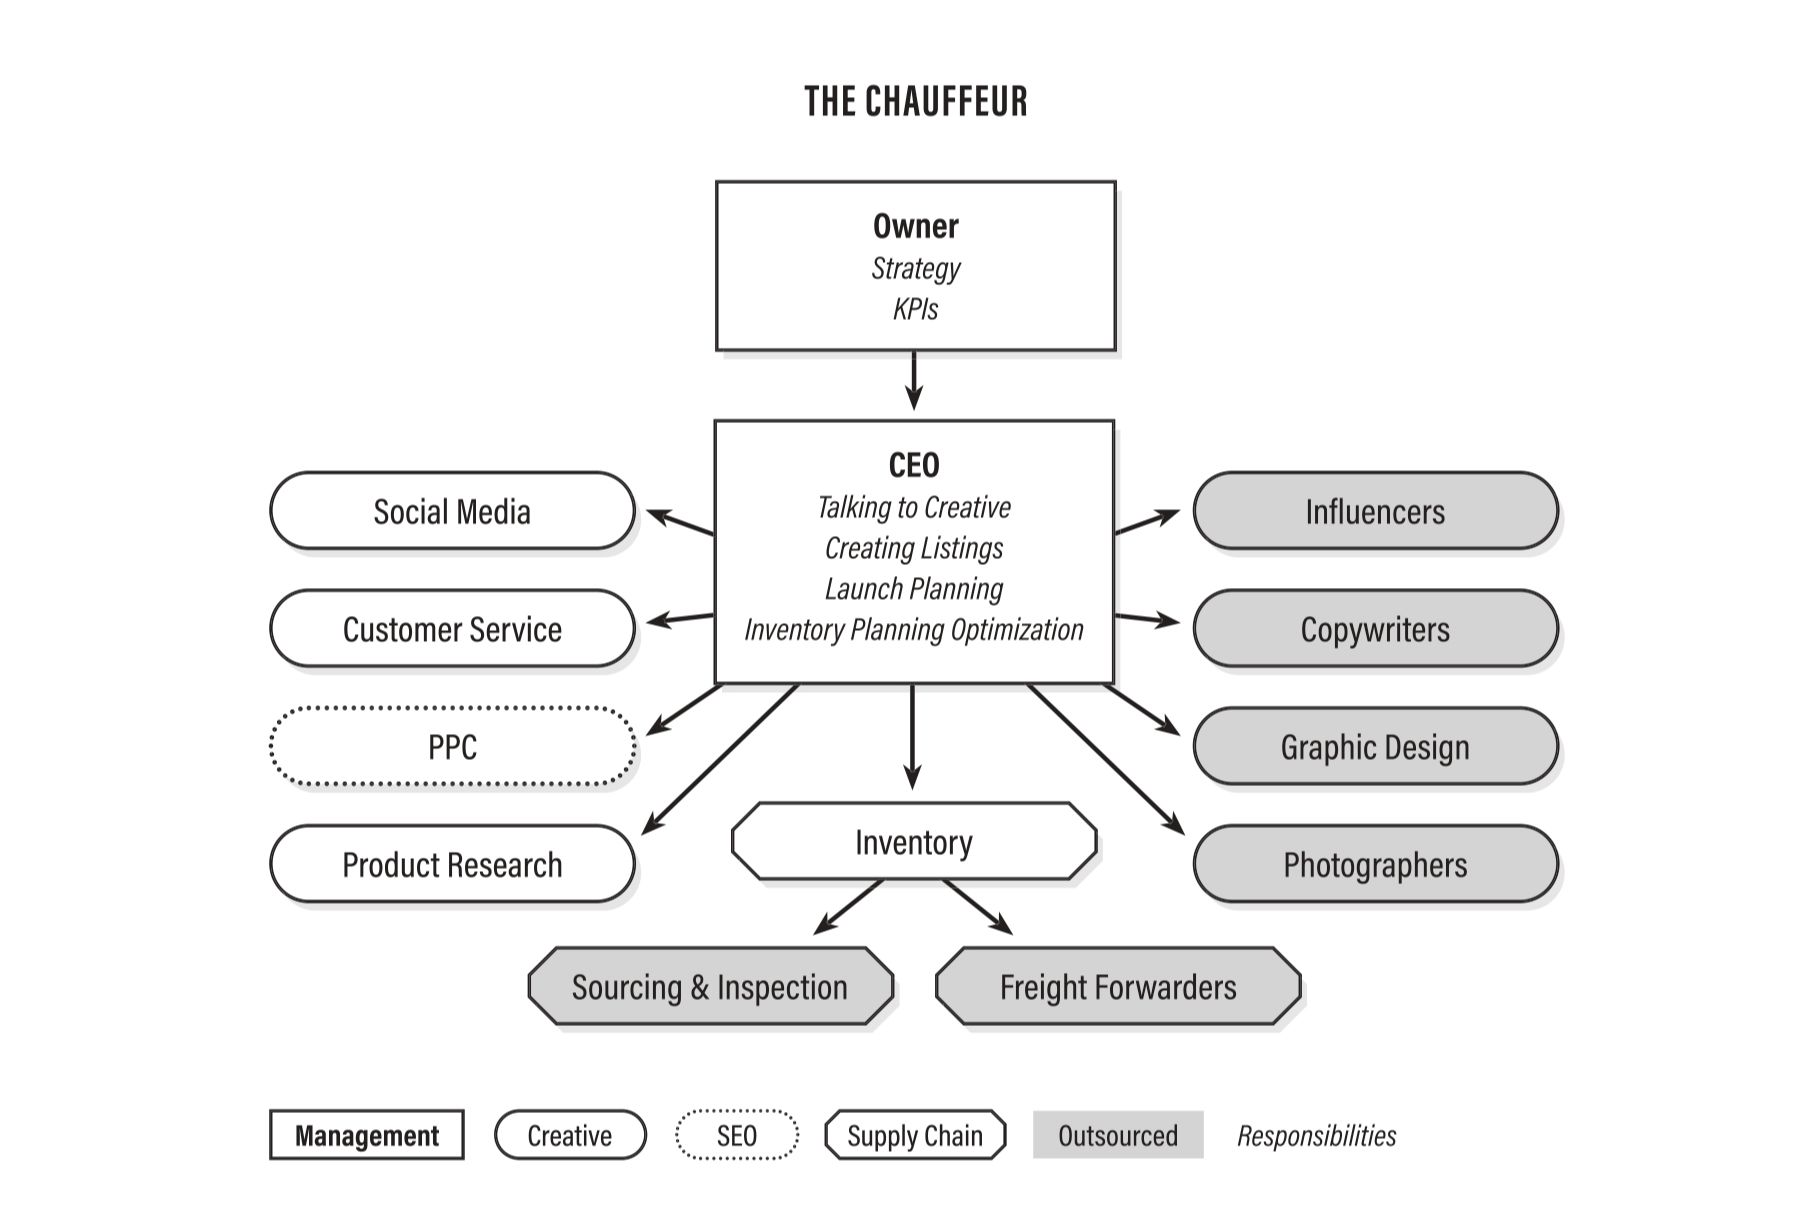
FIGURE 13: In the Chauffeur model, you hire a person or an agency and allow them to make the best decisions to accomplish your goals. In this example, the nonshaded boxes indicate five employees: Social Media, Customer Service, PPC, Product Research, and Inventory, plus one outside hire for a CEO.
CHAPTER 12: The Autopilot Business Model: People
GRAPHIC 12: Hire Early, Hire Well
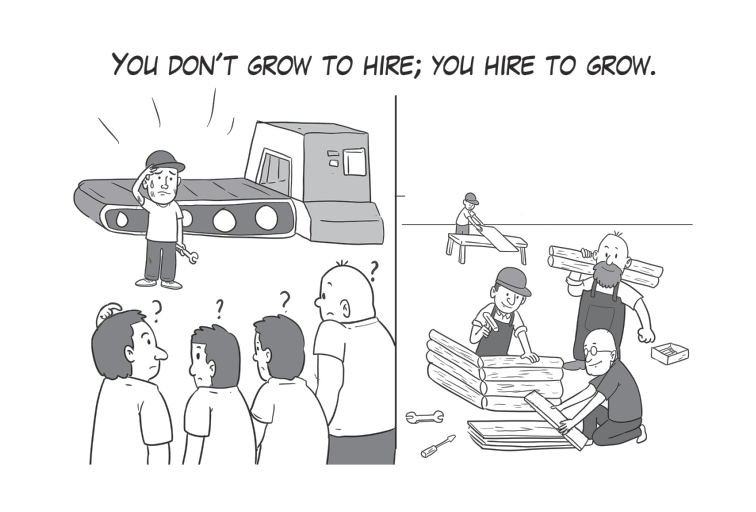
FIGURE 14: My preferred business structure, the Autopilot model, puts people, systems, and processes in place to ensure you reach your goals within your desired time frame while allowing you the freedom to spend your time outside of the business. In this example, the nonshaded boxes indicate seven employees: Operations Manager, Marketing Manager, SEO, Inventory, Customer Experience, Creative, and Social Media.
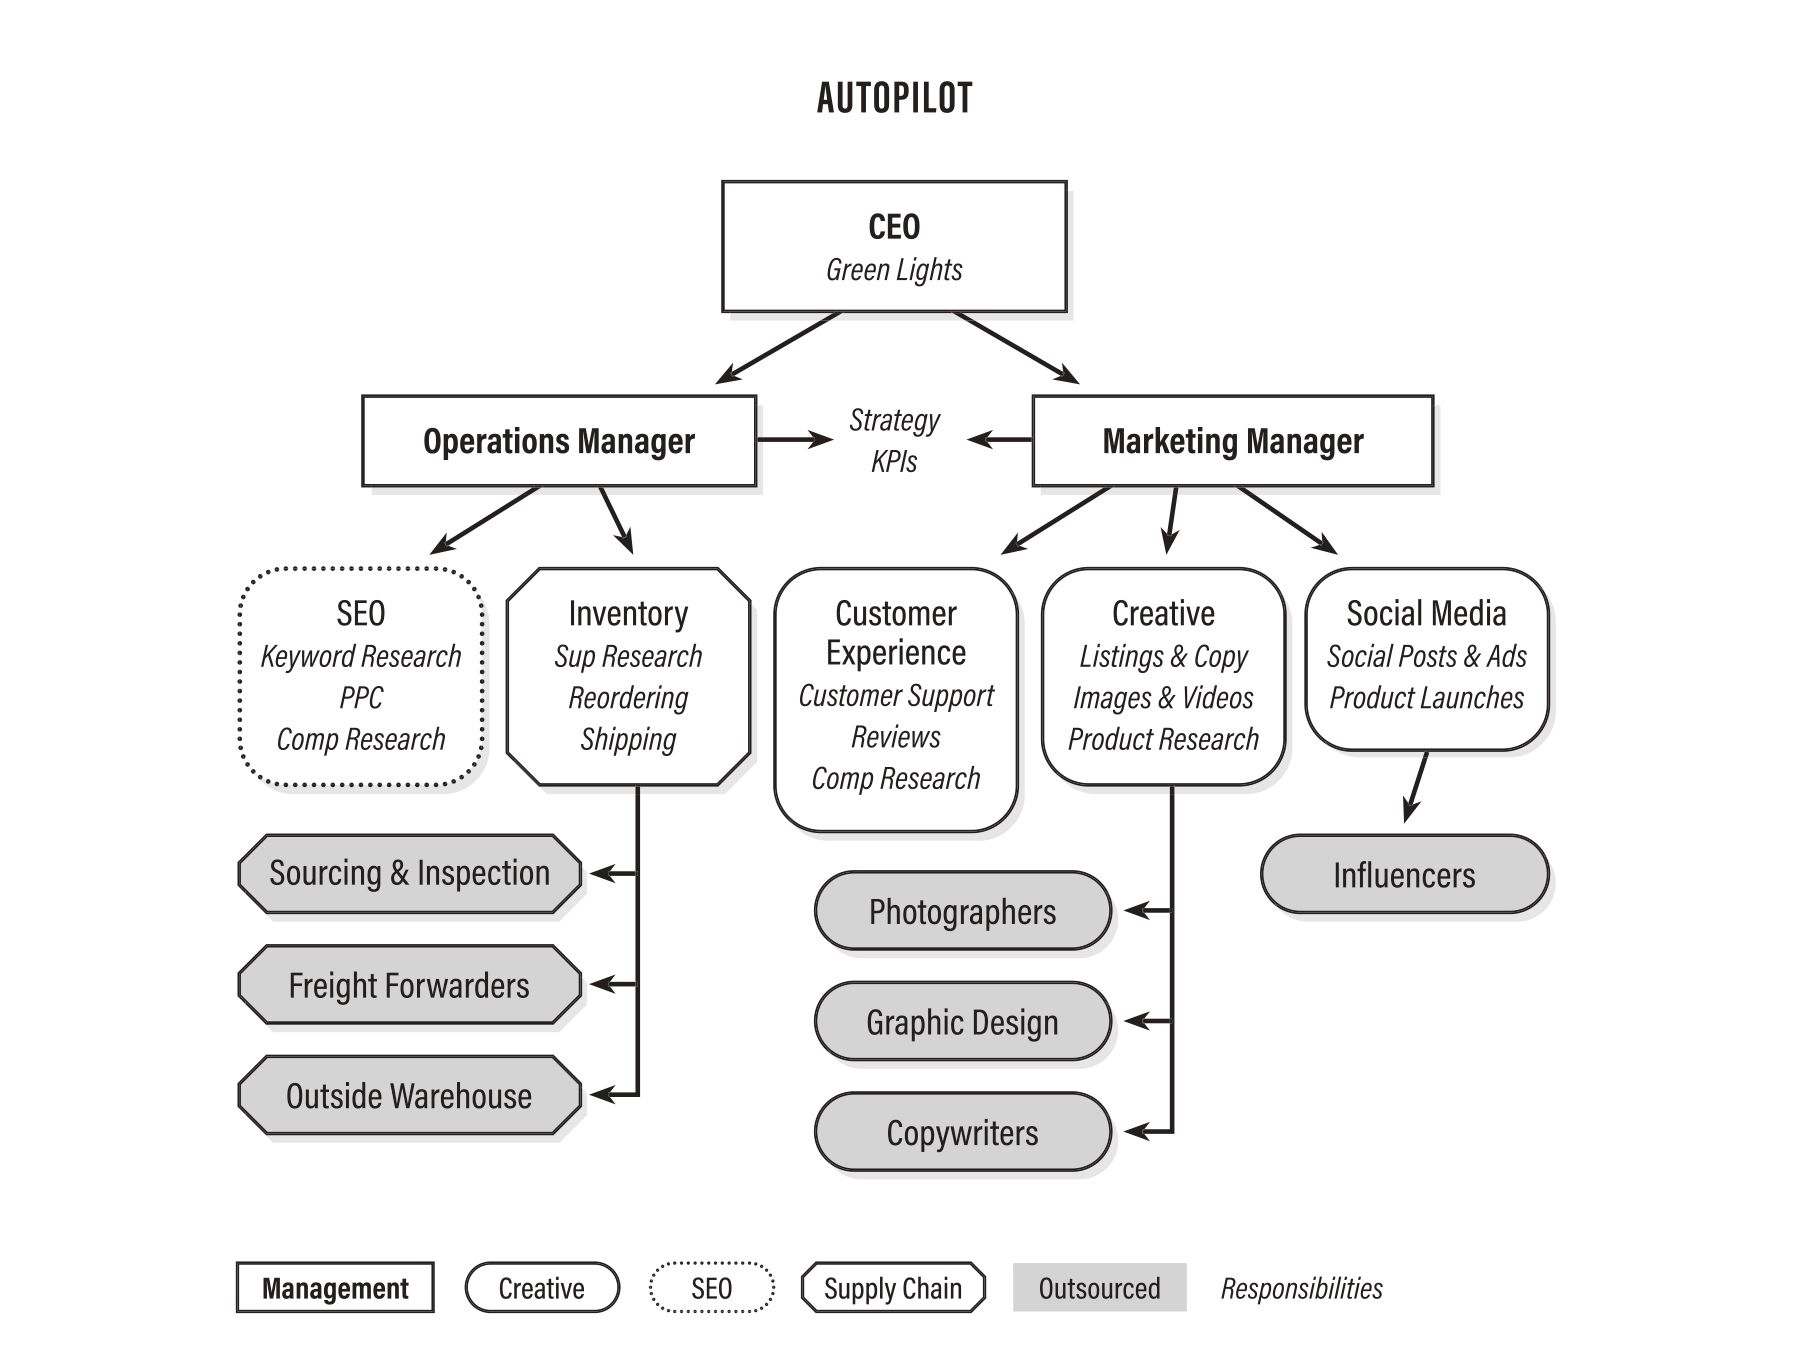
FIGURE 15: Build your Autopilot business structure in a way that facilitates, emphasizes, and encourages communication between your employees.
CHAPTER 13: The Autopilot Business Model: Systems and Processes
GRAPHIC 13: Systems and processes
CHAPTER 14: Selling Your Business
GRAPHIC 14: How much is your business worth?
GRAPHIC 15: What buyers want
CHAPTER 15: Floating to Shore
Breaker
Visit my breakers site at tomerrabinovich.com/breakers for more information.